
The editor
The editor is where you build your layout. It has four parts, and you will meet those four on every page of this manual.
Being able to read it comes first. If everything is too small for you, click Large buttons and text (150%) on the View tab. The ribbon and all the panels become one and a half times as large, in all your layouts. Quicker: press Alt + Shift + T; the same keys switch it off again.
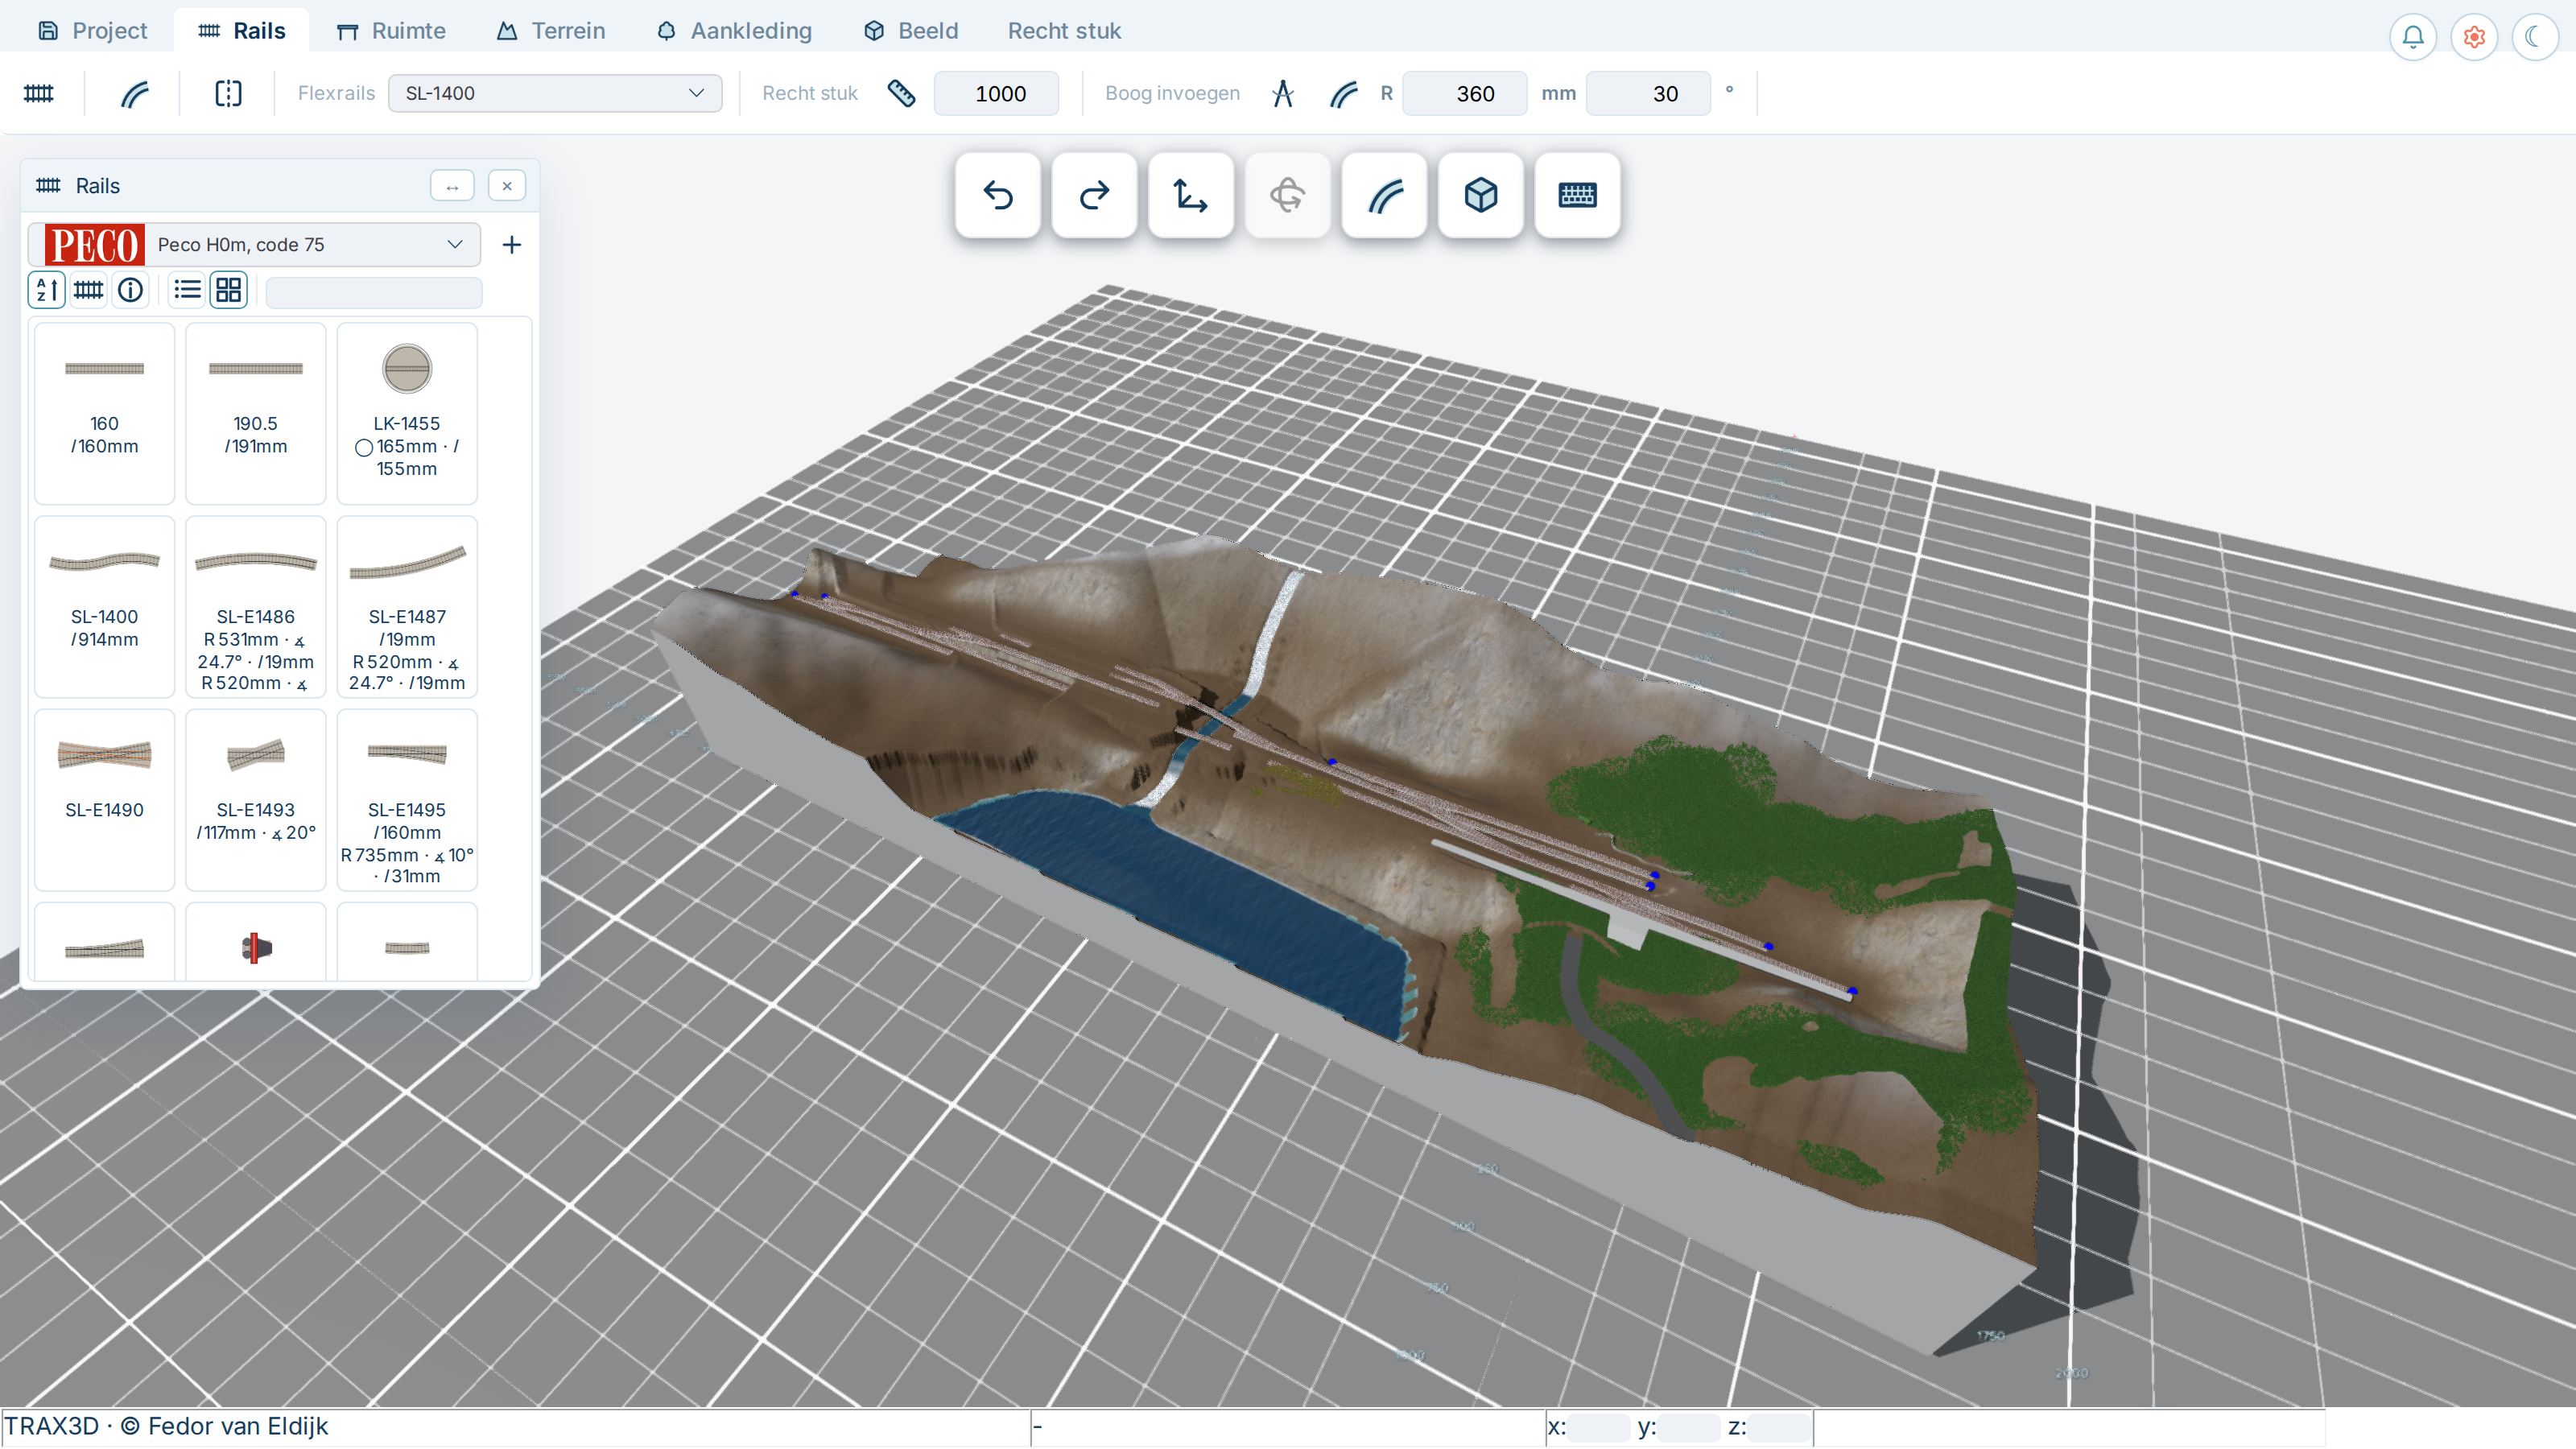
- The ribbon at the top is the bar of tabs that carries every button. Some of the tabs are always there, some appear only when they are of use.
- The panels are separate windows over the workspace: track pieces, buildings, trees, objects, the brushes and your layout's settings. You open them with the buttons on the ribbon and put them wherever you like.
- The workspace in the middle is your layout in 3D. That is where you lay track, sculpt the ground and put everything down.
- The status bar at the bottom keeps you informed: where your mouse is and what the editor is doing.
The next four pages walk through them one at a time.
TRAX has two faces
TRAX can show your layout in two ways: realistic, as it would look in real life, and CAD, as a technical drawing. They are not two programs — it is one layout looked at in two ways, and you switch between them with two buttons on the View tab. See Realistic and CAD.
2.1 The workspace
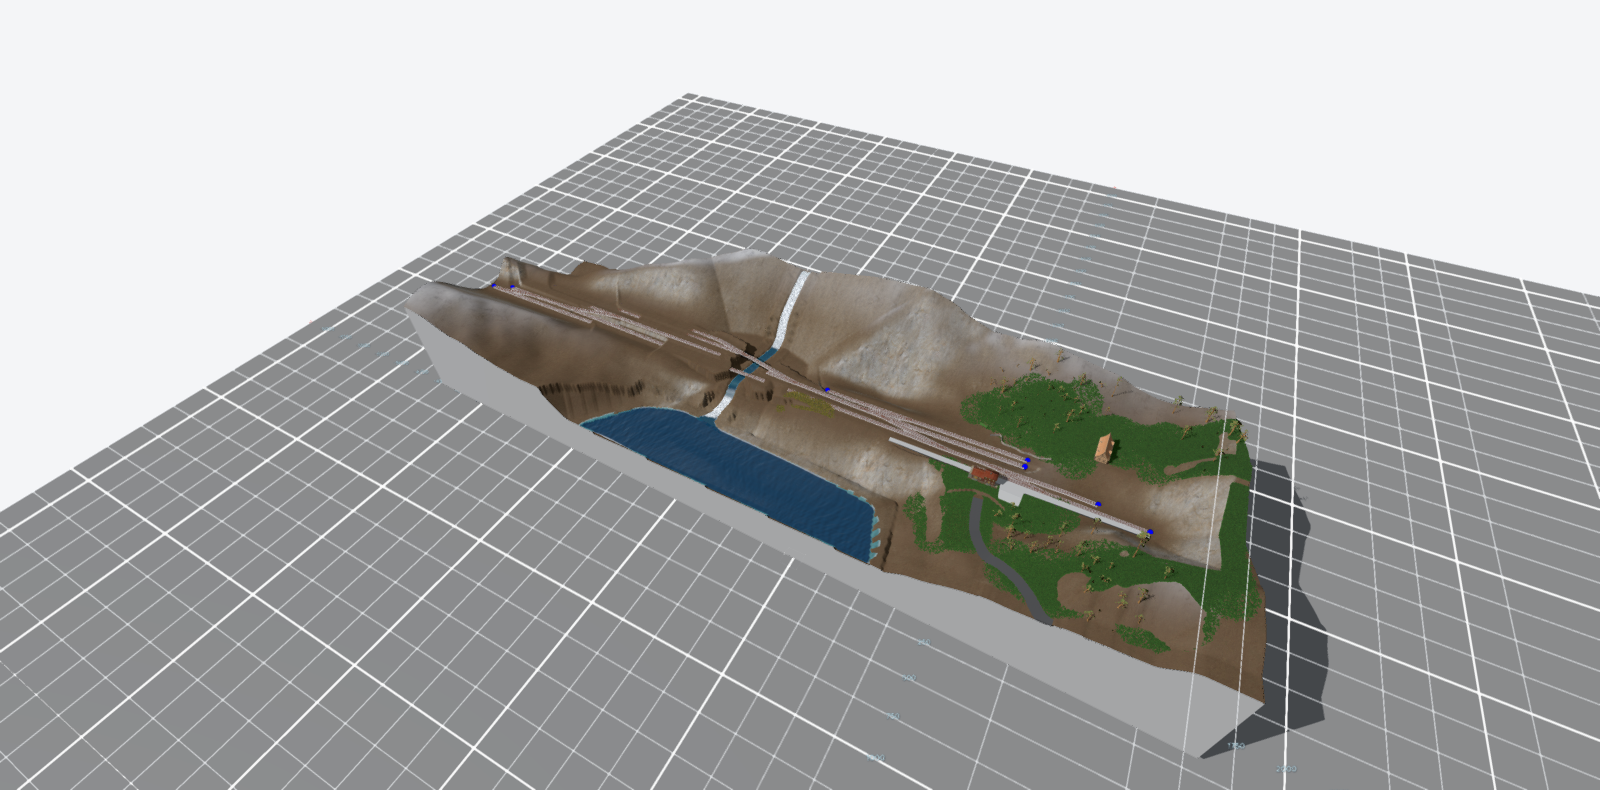
The workspace is your layout in three dimensions. Everything you build stands there.
Looking around
You move the camera with the mouse, and it works the same way as in a map program:
- Dragging the left button on an empty spot slides the view.
- Dragging the right button turns the camera about the point you are looking at.
- The scroll wheel zooms in and out.
The left button is your selection button as well. Click a piece of track, a table or a tree and you pick that up instead of sliding the view.
Lost your bearings?  Find the layout on the Project tab brings the camera back to the whole of it.
  and
and  zoom a step at a time.
The gizmos
A gizmo is the tool that appears on something the moment you select it: arrows to move it, rings to turn it, a handle to scale it. You take hold of an arrow or a ring with the mouse and drag; everything you do that way is one step, which Ctrl + Z undoes.
Which gizmo you get is switched on in the Gizmo group on the View tab:
 Move gives you arrows along the axes. Drag an arrow and the selected thing slides along that one direction, so you never move it sideways by accident.
 Turn gives you rings. Drag a ring and the thing turns about that axis.
The two are independent: you can have both on, and with both off you only ever select and your layout stays where it is.
Where the gizmo lands
- On track it lands on the dot you clicked, so on a connection. The vertical arrow is that point's height; the rest of the run follows.
- On a table it stands in the middle. While you are editing the shape with corners selected, it stands on the first corner you selected and the whole table turns about that.
- On a tree, a building or another object it stands at the foot. There is a scale handle with it: the vertical handle makes the object bigger or smaller, in every direction at once.
What else to know
- The click that ends a drag selects nothing. Otherwise every move would pick up whatever happened to lie under the mouse.
- A press that moves nothing changes nothing. So you can touch the gizmo without fear.
- A run of track that is locked gets no gizmo. That is exactly what the lock is for.
- An object you move stands on the terrain when you let go, and the ground under it adjusts.
- Escape lets go of whatever you are doing.
The grid and the floor
Under your layout lies a grid of lines with the measurements beside them. It is not part of your layout, it is an aid for judging distances. In the Settings panel you can switch the grid and the grey floor on and off independently, with the measurement labels.
Height 0 is the top of the rails, not the top of the table. Every height in TRAX is measured from that line, because that is the measurement a model railway is about: how high the train runs.
The status bar
At the bottom there is a bar. On the left is what the editor is doing — loading, saving, working out terrain. On the right are the coordinates of your mouse in the workspace, in millimetres.
The scale figure
 On the Project tab there is a switch that puts a little figure in your layout, with a measuring rod beside him. You can place the scale figure anywhere on the layout to get a feeling for the scale.
Why
Building in 3D costs you your sense of size. You zoom in and out, you look from above, and on your screen everything is as big as you want it to be. A station that looks right on screen turns out to be a garden shed. A hill that looks good turns out to be higher than a cathedral.
The scale figure is the answer to that: a person of 1.75 metres, at your project's scale. Put him next to what you are building and you see at once whether it is right.
What you see
- The figure is 1.75 metres. In H0 (1:87) that is 2 centimetres on your table, in N (1:160) a little over 1 centimetre, in 0 (1:45) nearly 4 centimetres.
- The rod beside him is five metres tall, with a tick every half metre. With that you read a height off without doing sums: a platform is half a tick, a signal gantry somewhere around the seventh.
Change your project's scale and he is sized again. So he always stands there correctly.
What you do with him
Click him; you get the move gizmo and slide him over the ground to the place you want to judge. When you let go he stands on the terrain, so on top of your hill he stands with his feet on the ground too.
Worth standing him next to:
- a station or an engine shed — is the door high enough for a person?
- a platform — 550 millimetres in real life is about knee height;
- a hill or a viaduct — a viaduct with trains passing underneath is six metres before you know it, so three and a half figures;
- a tree — a grown oak is twenty metres, a good eleven figures.
Delete takes him away again, or you turn the switch off.
He is not part of your layout
The scale figure is not saved with it and does not appear in the photograph of your layout. He is a tool for looking, not a figure you put down. There are no people to put on your layout yet.
Full screen
The Screen group on the View tab has a button for full screen. On a laptop it frees up so much room that it is worth remembering.
2.2 The ribbon
The ribbon is the bar of tabs at the top of the editor. If you know Microsoft Office, you already know this kind of menu. Every tab is a row of buttons, in groups set apart by a thin line. A button is only an icon: hold your mouse over it and you see what it does — and, where there is one, its shortcut. Only a field or a list has a small word in front of it. On this page the groups are named, so you know which buttons belong together.
Six tabs are always there. Four of them have the Panels group on the left: the buttons that open the panels belonging to that tab.
The quick menu
A few buttons you need the whole time, and then it is awkward to have to look up a tab for them first. Those stand at the top of the work area as well, large and white: the quick menu. It is there on every tab, and the buttons are the ribbon's own — press one and it goes on in the ribbon too.
Undo and redo, the move handle, the turn handle, the curve direction, the 3D/2D button and the shortcut drawing are on it to start with. Which buttons stand there is your own choice, under  Set up the quick menu on the View tab. That choice is remembered in this browser, so it is there again next time.
Project

Here is everything about your layout as a whole: saving, zooming, undoing, cutting and pasting, and your project's scale.
 Save to the cloud keeps your layout on the TRAX server. Do it often.
 Save the log downloads the event log. Send it along when you report a problem.
- Zoom in and out.
- Find the track plan brings the camera back to the whole of your layout.
- The scale figure on or off. You can put it anywhere on the layout to get a feeling for the scale.
- The project's scale. Everything TRAX sizes for you — grass, trees, buildings, the loading gauge — works from it.

 Undo and redo.
 Select with a box: draw a box around the pieces you want.
 Copy and cut to the clipboard.
 Paste from the clipboard, and delete.
 This manual, and reporting a problem.
 Leaving the editor.
Track

The Track tab is about flex track and about which way a curve bends. The track pieces themselves come from the Tracks panel, not from here.
 Panels: the track pieces.
 Direction flips which way a new curve bends.
- Flex track: the flex pieces in the library you are using.
 Straight inserts a straight length of flex track as long as the figure beside it.
 Insert a curve makes a curve with the radius and the angle you give it.
See Flex track for what you can do with it.
Room

This is where you make tables: the ground your layout stands on.
 Draw a table puts down a new one.
 A table around the layout makes one that fits exactly around the track that is already there.
See Making tables.
Terrain

The Terrain tab is about the ground itself: its shape and its texture.
 Panels: shaping the terrain, and painting textures. Each of those two is a brush; see Shaping the landscape and Ground types.
 Generate the terrain makes the landscape for you, Flat again takes it away.
- Texture: the window where you choose which textures you use.

 Water: a lake or a sea, and a river.
 And a canal.
Scenery

Everything that stands on the ground.

 Panels: the buildings, and the trees and bushes.
 And the objects, and the growth. The trees and objects panels hold the spray can, with the radius and the density.
 Platform draws a platform along the track you have selected.
 A road and a fence.
 A hedge and a wall.
View

How your layout looks, not what is in it.
 Panels: the settings. The Checks panel is on the CAD tab, beside the checks themselves.
 Put the panels back in their own places forgets where you had put the panels.
- Screen: full screen on or off.
- Large buttons and text (150%) makes the ribbon and the panels one and a half times as big.
 Quick menu: choosing what stands in the quick menu, and the drawing of the keyboard with every shortcut on it (Shift + ?).
 Gizmo: switching between 3D and 2D. In 2D you look straight down and the camera does not turn; see Working in 2D.
- The move gizmo and the turn gizmo.
- Look: Realistic, and CAD.
- Terrain — See-through (50%) makes the ground half transparent, so you can see and click the track under a hill.
- Terrain — Track only hides tables, landscape, growth, buildings, platforms, roads and water, so that only the track is left. Nothing is removed.

 Lines: outlines and the labels on the track pieces, on or off.
- And the textures on or off.
The grid, the grey floor and the background colour are not here but in the Settings panel.
The context tabs
To the right of View another tab appears the moment you select something. What is on it depends on what you clicked: a piece of track, a table, a road, a stretch of water, a platform or an object. See The context tabs.
And if you choose the CAD look, the CAD tab joins them, with the measuring tools. See The drawing.
2.3 The panels
Everything you choose from or work with is in a panel: the track pieces, the buildings, the trees, the brushes, the settings. A panel is a separate window over the workspace. You can have several open at once, and you put each panel wherever suits you.
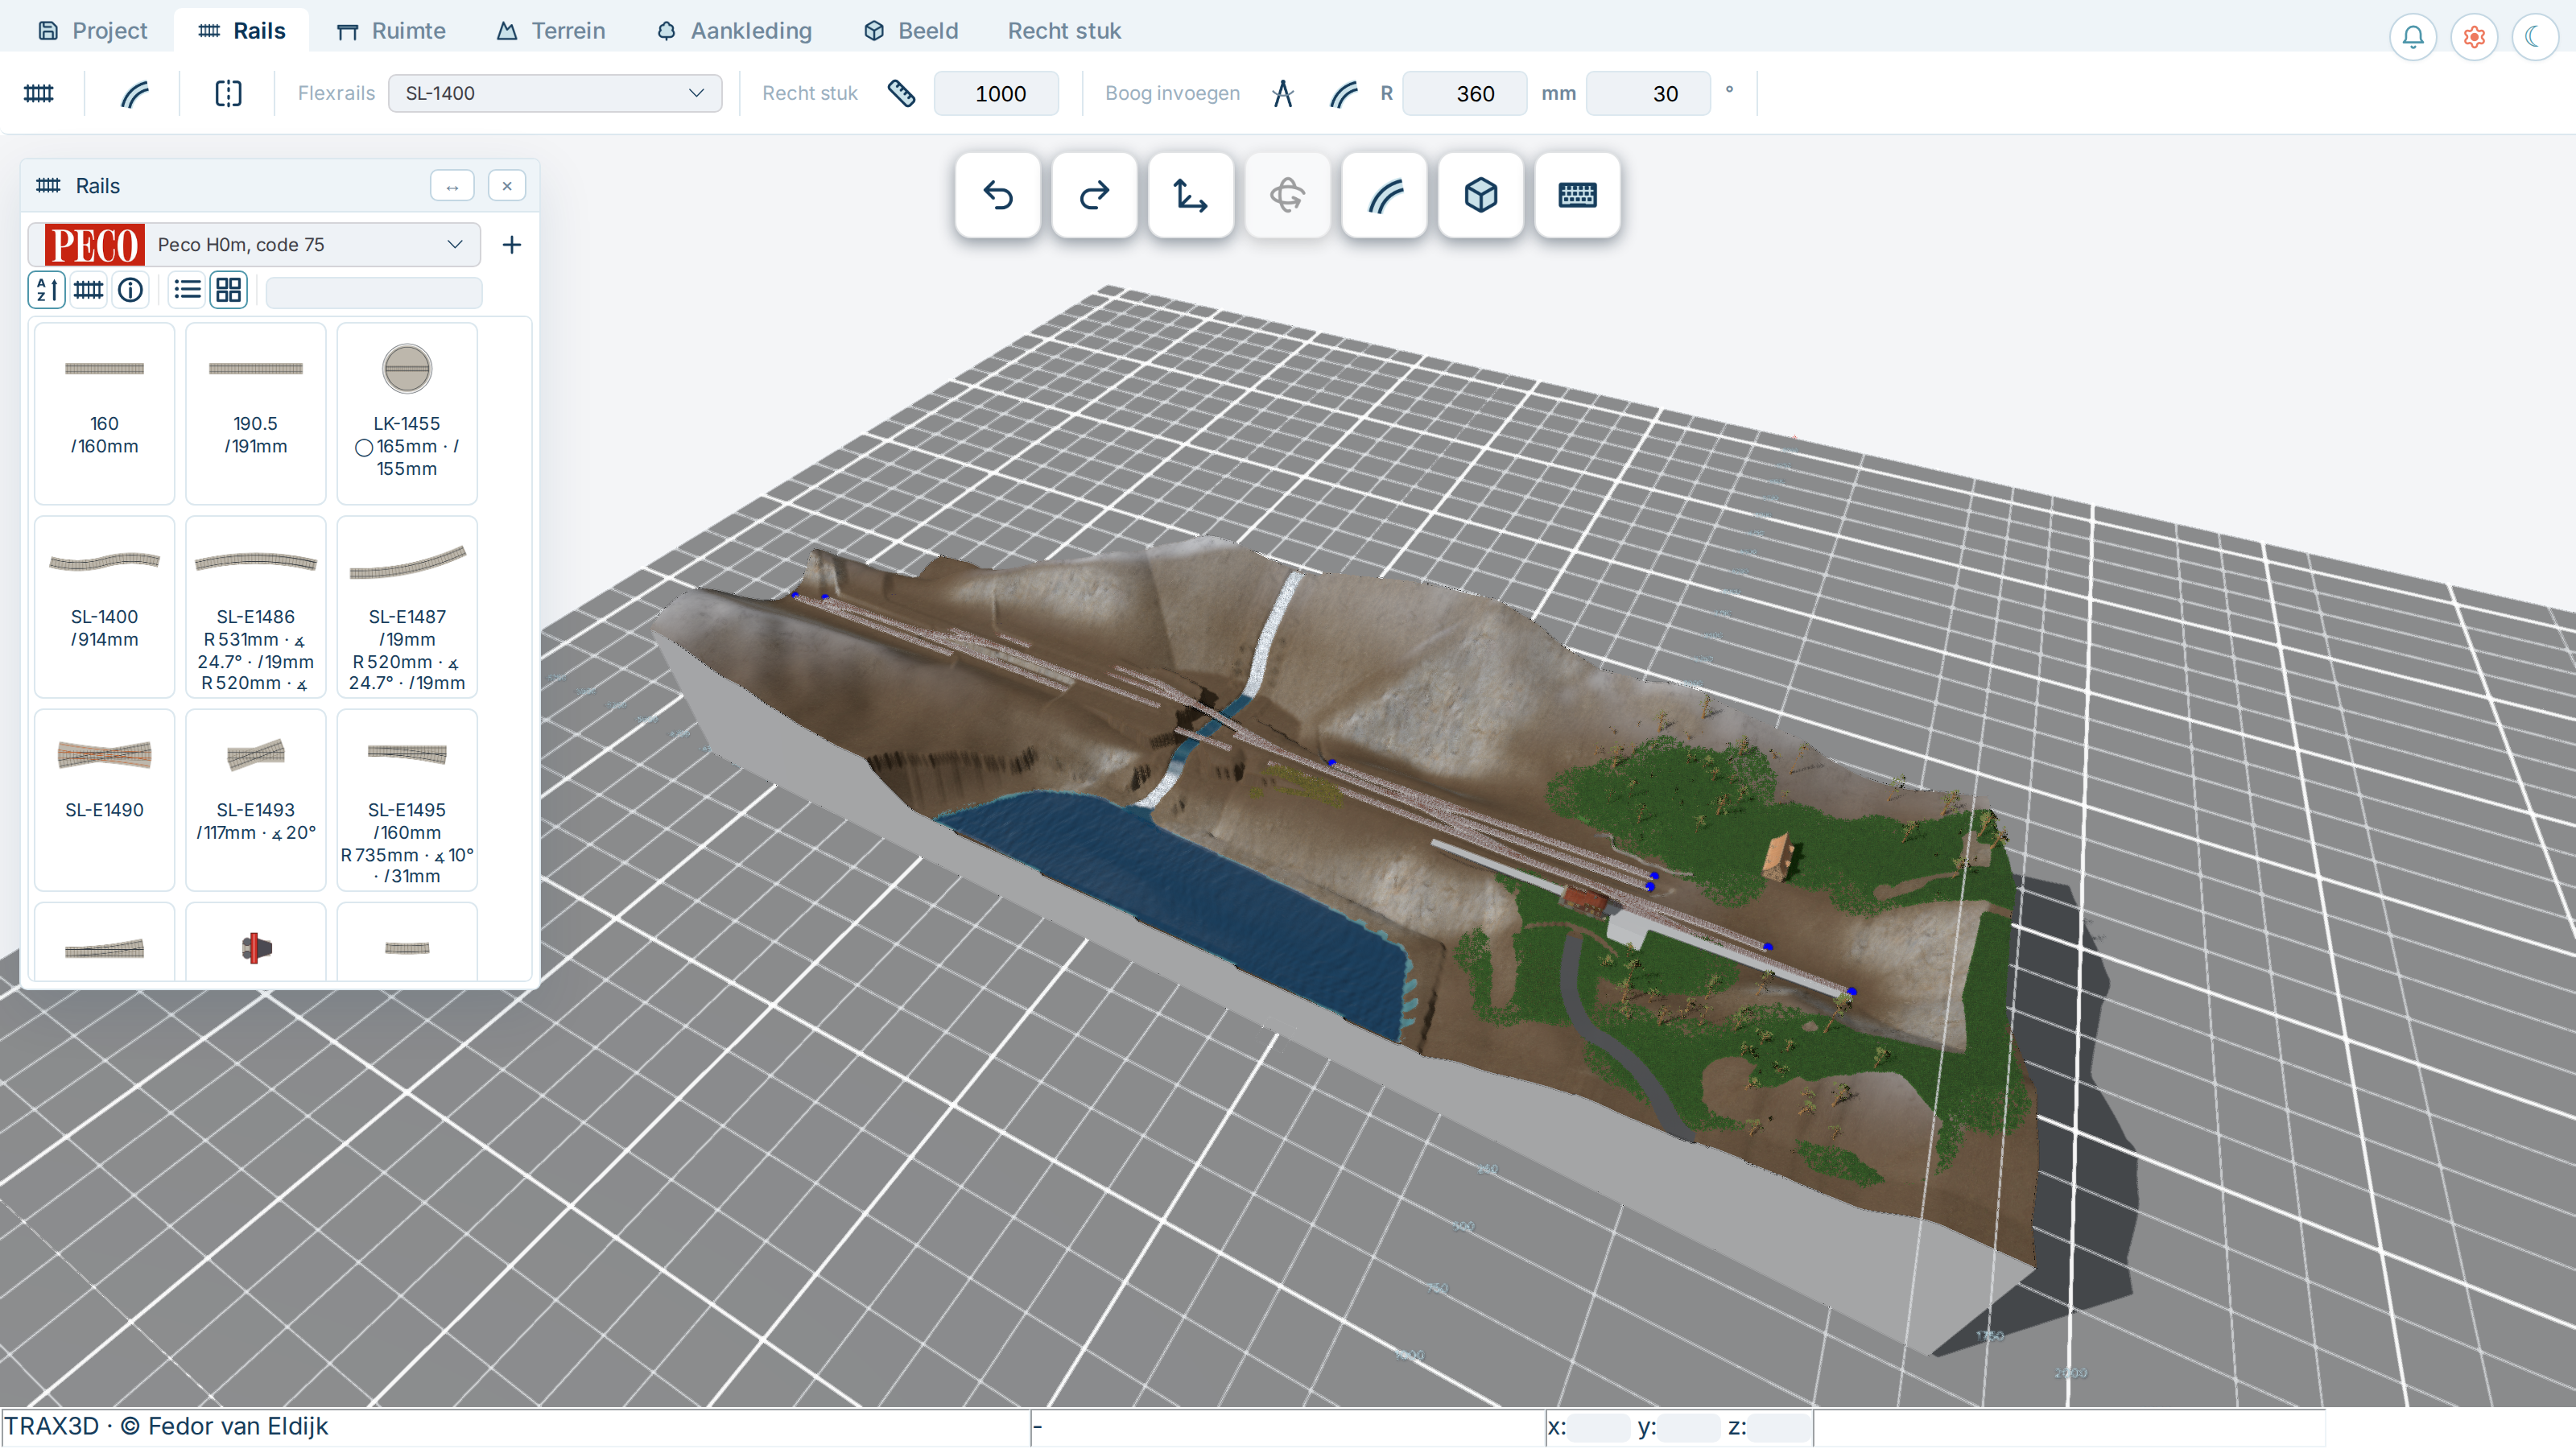
Opening and closing a panel
Every panel has a button on the ribbon tab it belongs to, in the Panels group. Click that button and the panel opens. Click it again and it closes.
- On the Track tab: the track pieces.
- On the Terrain tab: shaping the terrain, and painting textures.
- On the Scenery tab: the buildings, and the trees and bushes.
- There too: the objects, and the growth.
- On the View tab: the settings.
 On the CAD tab: the checks, beside the button that turns them on.
You can also open the settings with the orange gear at the top right, beside the little moon.
Two panels open by themselves. The Track tab opens the Tracks panel and the View tab opens the settings. If you do not want them, simply close them again.
Moving, widening, closing
Every panel has a bar at the top with its icon and its name.
- Moving: take hold of the bar and drag the panel wherever you like.
- Wider or narrower: the ↔ button on the bar makes the panel twice as wide, and back again. Handy for a long list of tiles.
- Closing: the cross on the bar.
- To the front: click anywhere in a panel and it comes to lie on top of the others.
TRAX places a new panel itself: first along the left edge, then along the right edge. That keeps the middle of the workspace free.
Where you put a panel, TRAX remembers. It also remembers whether you made it wider. That holds for all your layouts, so your panels stand in the same place in every layout. TRAX keeps it in your browser: on a laptop and on a big screen you can therefore place them differently.
If you want everything back the way TRAX does it itself, click Put the panels back in their own places on the View tab.
Larger buttons and text
If you find the buttons and the text too small, click Large buttons and text (150%) on the View tab, beside the full-screen button. The ribbon and all the panels then become one and a half times as big. Click it once more and everything is back to normal. TRAX remembers this choice in your browser too, for all your layouts.
Waiting for the connection
On a slow connection, loading the editor or saving your layout can take a while. A small card with a spinning wheel then appears at the bottom right, saying what TRAX is doing: fetching your layout, loading the track libraries, laying the track, loading models or saving your layout. The card disappears by itself when it is done.
If saving fails because the connection drops, TRAX says so. Your work is then still in the editor: try again once the connection is back.
Brushes in a panel
Four panels are a brush: Shape the terrain, Paint textures, Growth (the grass), and the spray can in Trees and bushes and Objects. At the top are that brush's settings, such as the radius, the strength and the density.
With shaping, painting and growth, panel and brush are one. Open the panel and you pick up the brush. Close it and you put the brush down. Esc also puts the brush down and closes the panel.
Trees and objects are first of all a list to choose from. The spray can there only comes on when you click it. Close such a panel and the spraying stops.
The Tracks panel
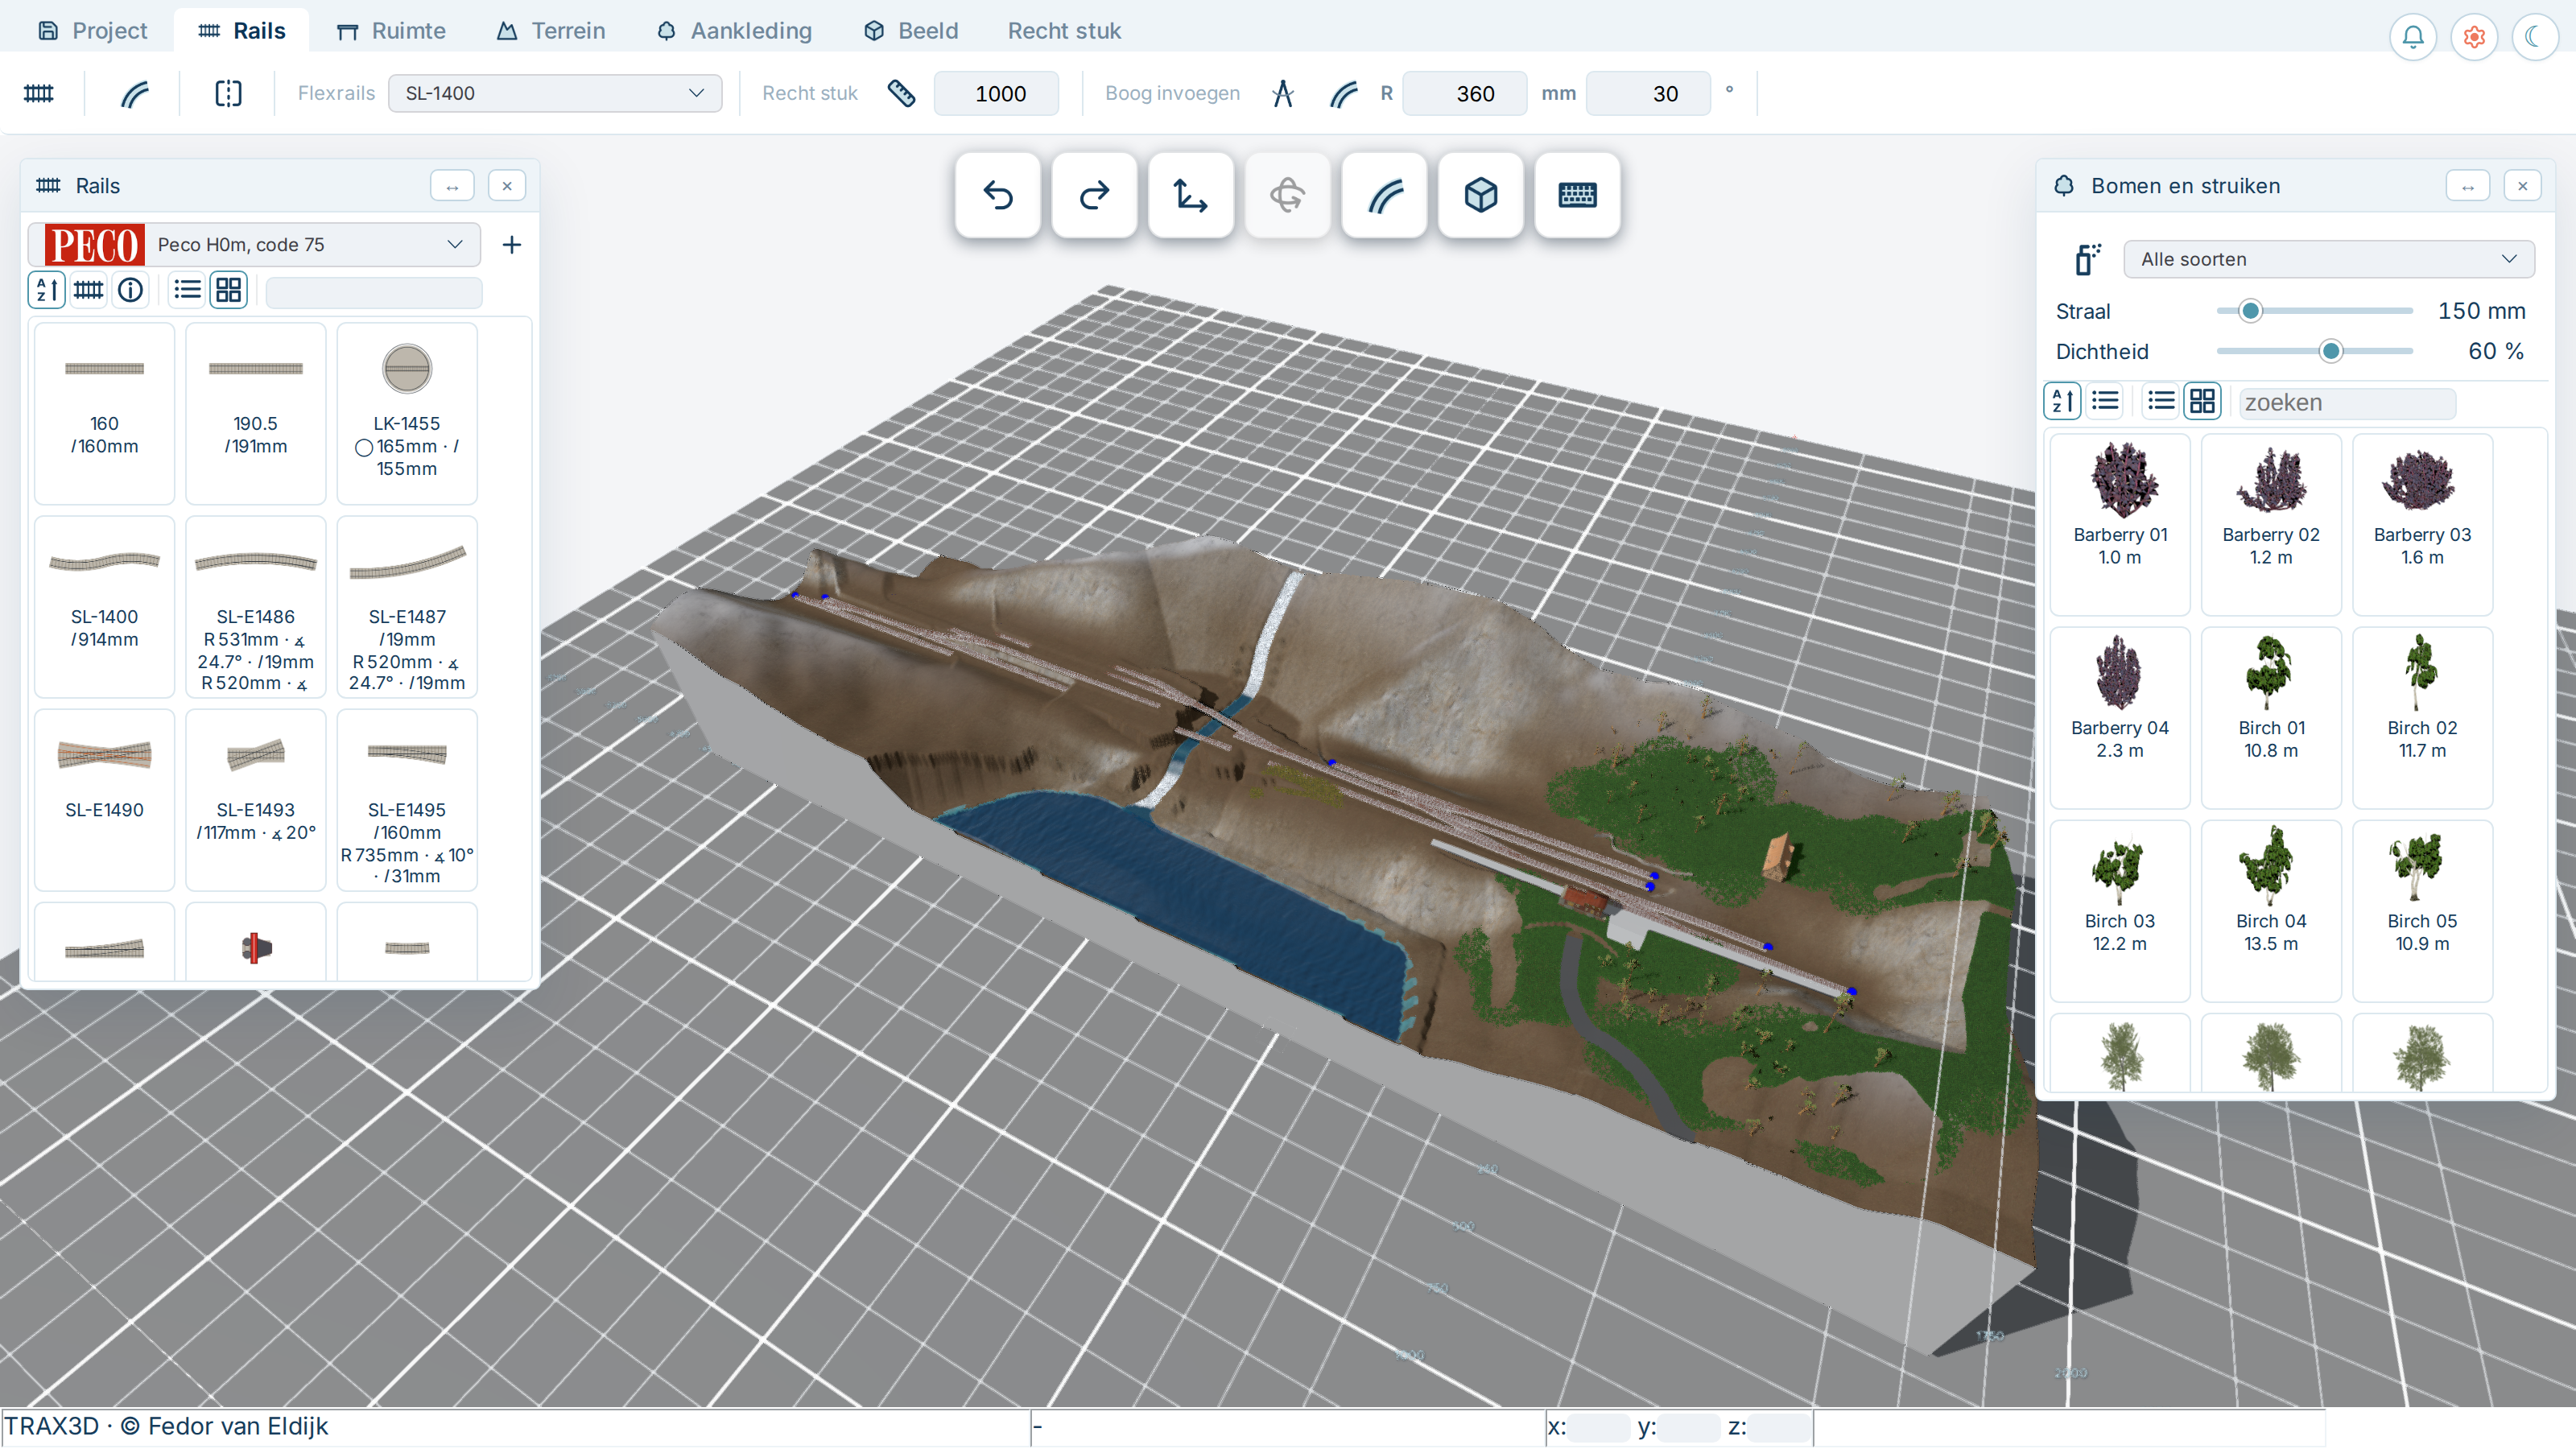
At the top is the library you are using, with  a button beside it to add another. That is where you choose your makes: Peco, Märklin, Fleischmann, Roco, Kato and so on. You may add as many as you like and use them together in one layout — the best turnouts of one make with the nicest flex track of another.
Under the library is a bar for sorting the list by name, by kind or by size, switching between a list and tiles, and searching on part of an article number.
You use a piece from the list in two ways: double-click lays it at the selected end of your layout, dragging puts it down where you let go.
Buildings, trees and objects
Those three panels work like the Tracks panel: sorting, searching, list or tiles. Every model shows its real height, so you know at once whether that station suits your layout.
You drag a model into the workspace, or double-click it to put it down.
With trees and objects the  spray can is at the top, with a dropdown of the species beside it and the radius and the density under it. Choose a species and the list shows only that species, and the spray can sprays it. Choose All species and it sprays everything mixed together. Click rows yourself, with Ctrl several at once, and it sprays exactly those. See Trees and bushes.
The settings
The Settings panel holds the settings that apply to your whole layout, in groups:
- Grades — the steepest grade TRAX allows itself when it adjusts heights, separately for straight track, curves and the rest.
- Look — realistic or CAD, and whether outlines, labels, textures and ink lines are on. Every look remembers its own settings.
- Units — millimetres, centimetres or inches. Everything in the editor works in these.
- Terrain — the style of the landscape (rolling, hills or mountains), how high and how coarse, how hard the wind blows, and whether the terrain moves along with your track and objects.
- Table — the height and the colour of your tables' fascia.
- Grid — the grid and the grey floor on or off, the measurement labels, and how big the squares are.
These settings belong to your layout and are saved with it. Where your panels stand does not belong to your layout, but to you.
2.4 Realistic and CAD
TRAX shows your layout in two ways. It is the same layout; only the way of looking differs. You switch with two buttons in the Look group on the View tab.
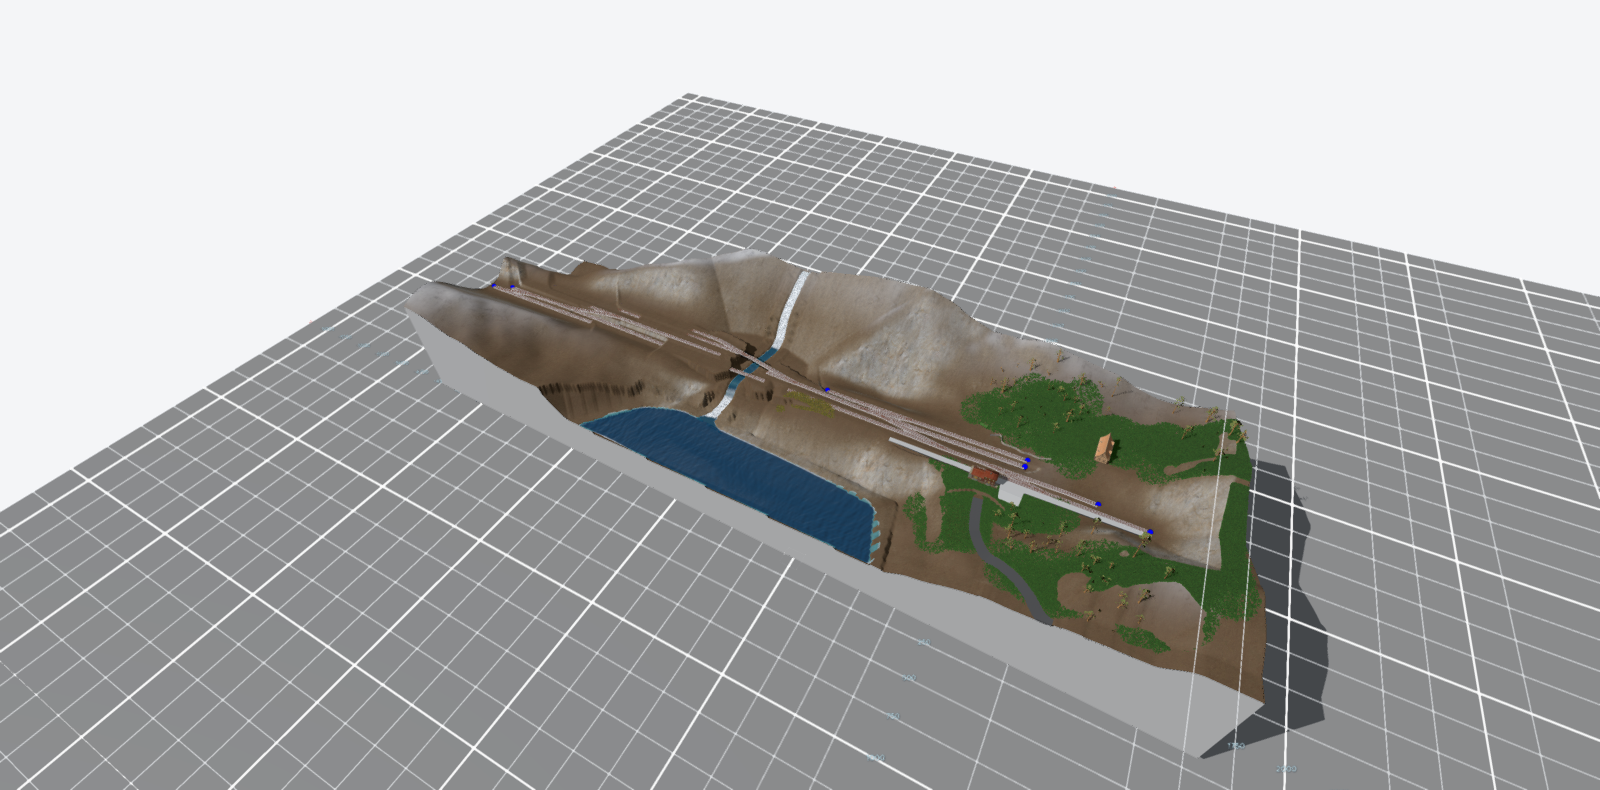
Realistic
Realistic shows what your layout would look like in real life: sun and shadow, textures on the ground, trees and grass moving in the wind, water flowing. This is the look for judging whether your layout looks good — and for taking a photograph of it for the showcase.
CAD
CAD shows the drawing. No textures, no wind, no grass: only what you need to understand the layout. Every part takes a flat colour for what it is — platform, road, wall, water — and trees are replaced by a cone or a ball of the right height. The shadows stay on, because without shadow a drawing cannot be read in three dimensions.
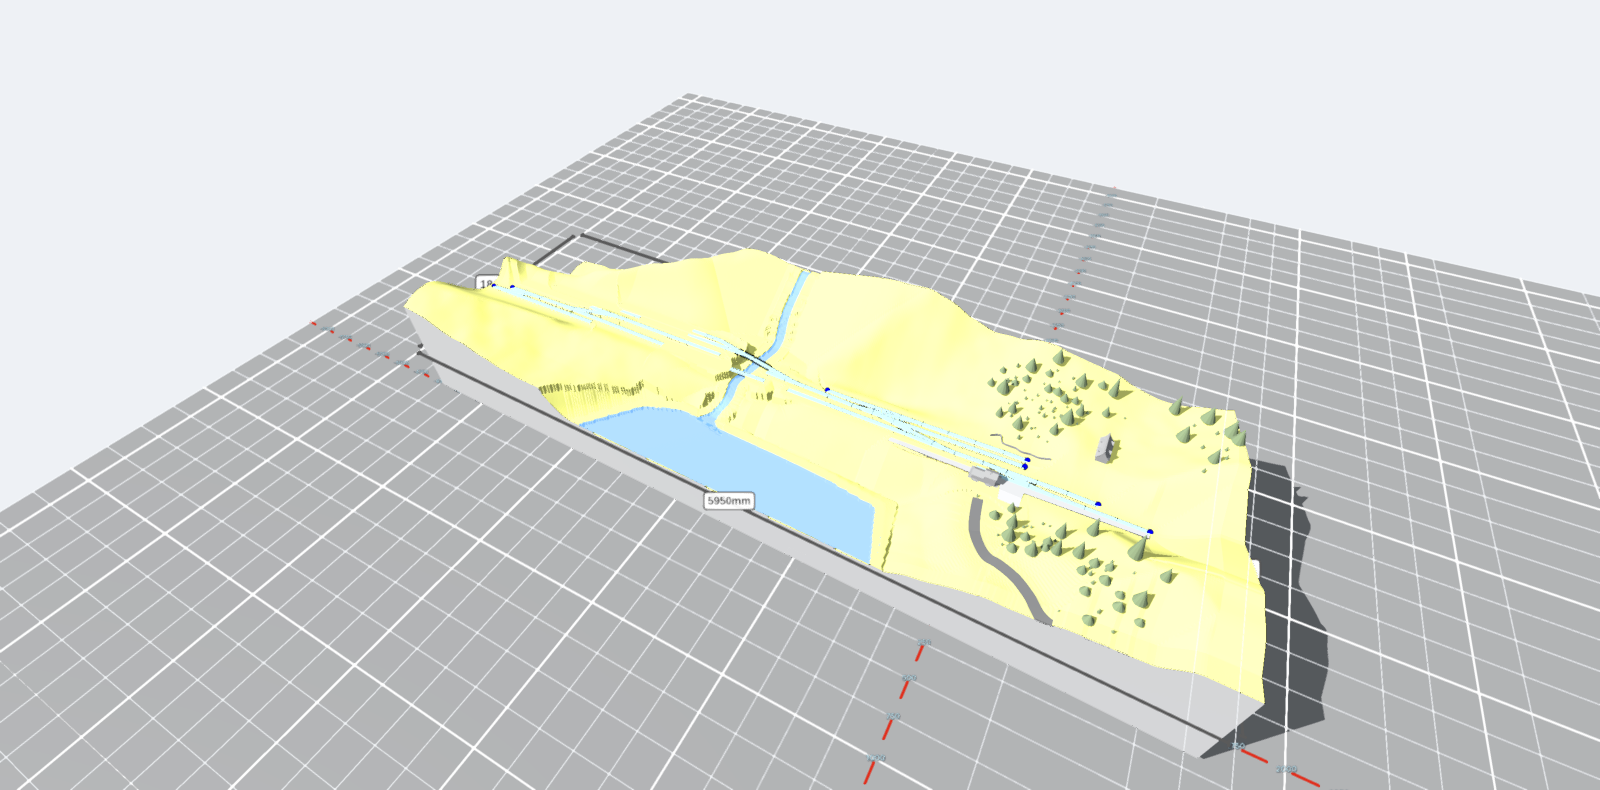
In CAD you get one tab more: CAD, with the measuring tools. Every side of every table is dimensioned automatically, and you can add lengths, angles, heights and texts of your own. See The drawing.
What you choose stays yours
A look sets a handful of switches: CAD, for instance, turns the outlines, the labels and the grid on and the textures off. After that those switches are simply yours again. If you want labels in the realistic look or no grid in CAD, turn them round — TRAX remembers per look what you chose and does not quietly put it back.
Your layout is saved with the look that was on, so it comes back the way you left it.