
WAZO objects
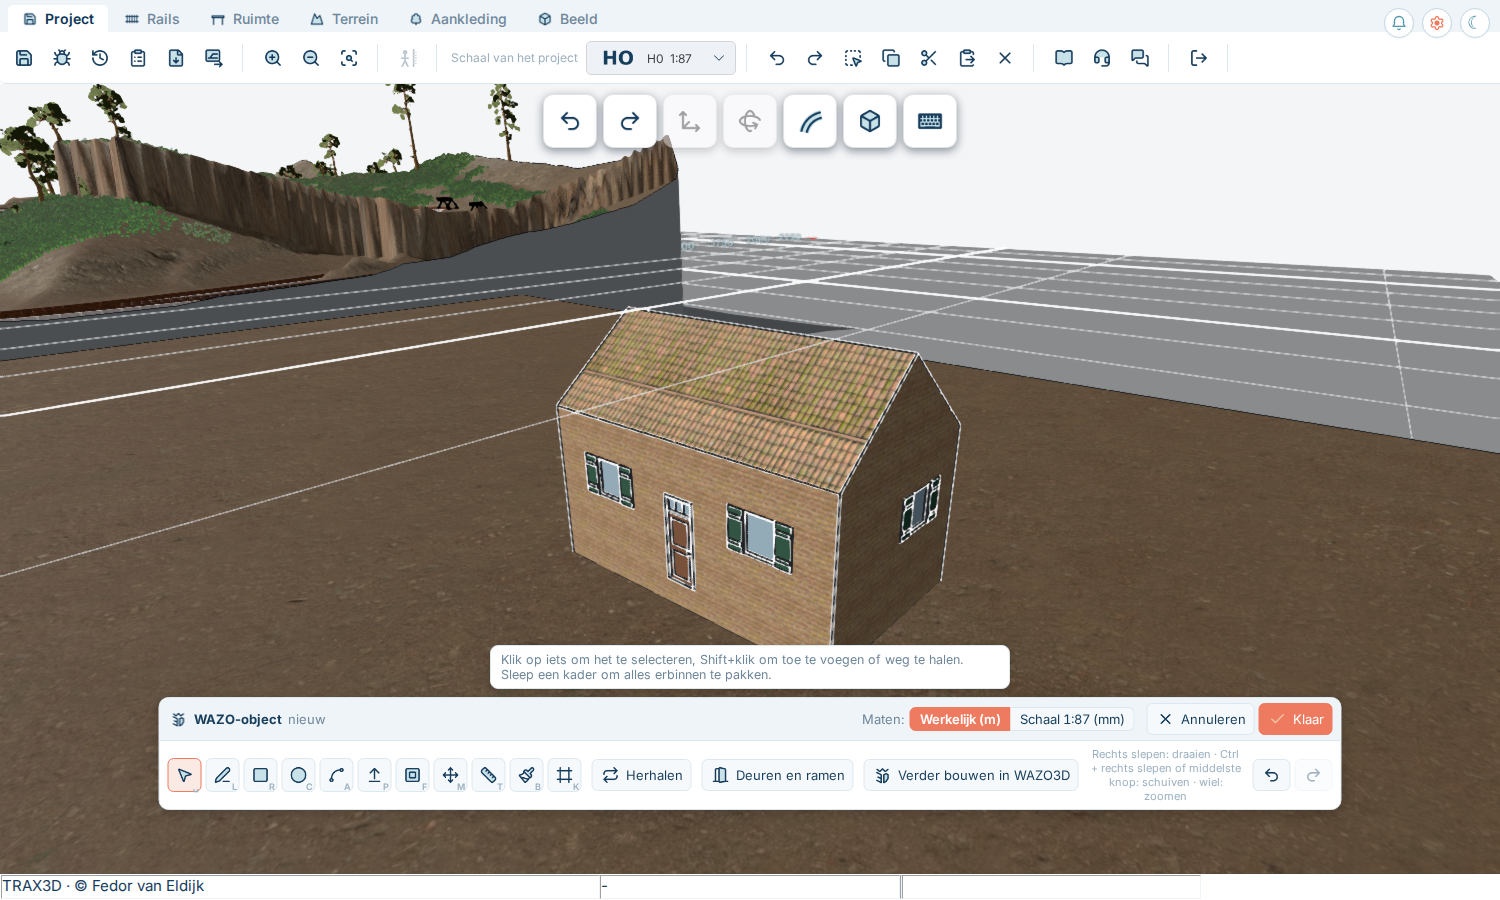
If the building you are looking for is not in the catalogue, draw it yourself. That is what WAZO in TRAX3D is for: a drawing program for buildings, right in the middle of your own layout. You draw a floor plan, push it up into a building, put windows and doors in it and give the faces a colour or a texture. What you draw is called a WAZO object.
You draw on the spot where the building will stand, among your own track and hills. So you see at once whether it fits: whether the shed fits beside the track, whether the station does not vanish into the slope.
Standard components
You do not draw a house brick by brick. WAZO has standard components that you put on a wall ready-made:
- Windows — from a plain window to a window with glazing bars or shutters, an arched window, a roof window, a shop window or loading doors with a hoist beam.
- Doors — a front door with a fanlight, a stable door, a plank door with strap hinges, a double door.
- Garage and shed doors and industrial doors for goods sheds and workshops.
They cut their own hole in the wall, and you can change their size. On top of that come the standard textures: brick, stone, plaster, wood, roof tiles and more, each at the right size.
Roofs are standard components in WAZO3D, the full program: a gable roof, hip roof, shed roof, mansard roof, sawtooth roof and many more, with one click on your walls. In TRAX3D you make a roof yourself, with a ridge you move up; see Drawing.
In this chapter:
- Drawing — starting, looking around, the tools and how to type a size.
- Windows, doors and repeating — holes in the walls, and a row of windows in one go.
- Painting — colours and textures, and how big a brick is.
- Keeping, changing and sharing — Done, drawing on later, and giving your object to others.
- More in WAZO3D — roofs, round shapes, tracing photographs, and print and cutting files to build your building for real.
Real size or scale size
You choose the measure you work in, and you can switch at any moment:
- Real — the real size in metres. A shed of twenty metres you draw twenty metres long; TRAX3D puts it at the scale of your layout. Handy when you are drawing a real building.
- Scale — the size on your layout in millimetres. Handy when a building has to fit exactly into a corner of your layout.
The model stays the same; only the numbers change. See Drawing.
What you need an account for
WAZO only works when you are signed in and editing your own layout. Your WAZO objects belong to you: they are in your buildings panel, on every layout of yours.
7.1 Drawing
Starting
 On the Scenery tab, in the WAZO objects group, the button Build a WAZO object starts drawing. WAZO starts where you are looking: on the table in the middle of the view, or on the ground when there is no table there. So first bring the view to the spot where the building should go.
At the bottom in the middle the WAZO bar appears: the tools, the size you are typing, and on the right Cancel and Done. While WAZO is open, TRAX3D's ordinary buttons and shortcuts do not work; they come back when you are done.

Looking around
The left mouse button belongs to WAZO: you draw with it. You work the camera with the other buttons:
- Right-drag turns the view.
- Ctrl + right-drag, or the middle button, moves the view.
- The wheel zooms in and out.
The tools
Every tool has a button on the bar and a letter on the keyboard.
 Select (Space) — click a face, a line or a part.
 Line (L) — draw lines from point to point. A closed shape becomes a face.
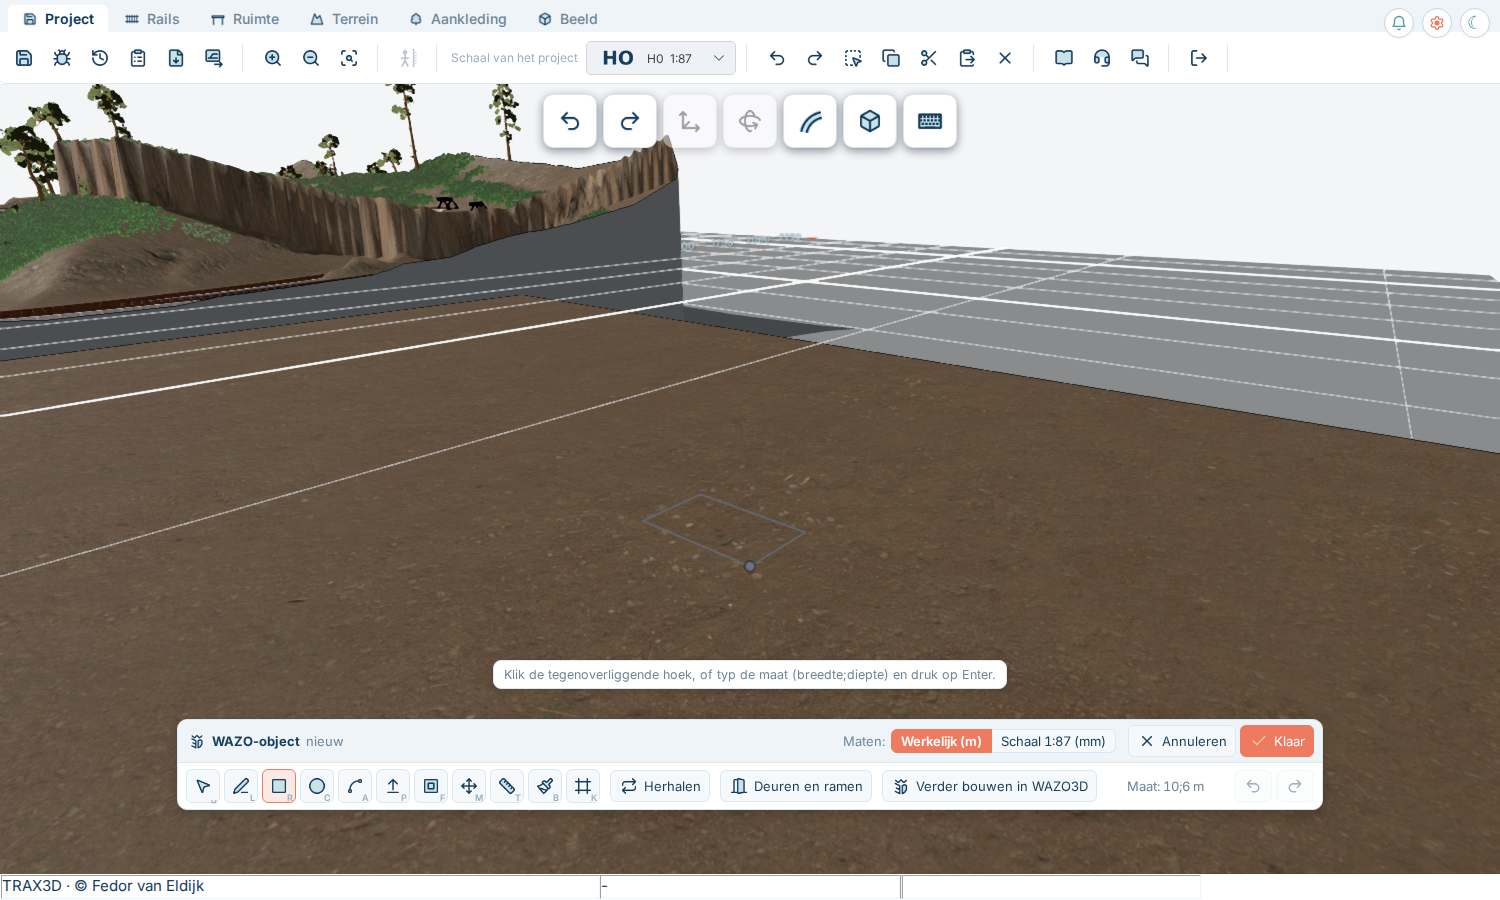
 Rectangle (R) — the quickest floor plan: click one corner and then the opposite one.
 Circle (C) — for a water tower, a silo, a round engine shed.
 Arc (A) — a curved line, for a roof or an archway.
 Push/pull (P) — pull a face up into a block: from floor plan to building. Or push it in, for a niche.
 Offset (F) — an edge a little inwards or outwards: a roof edge, a plinth, a window frame.
 Move (M) — move what you have selected.
 Measure (T) — measure a distance in your model.
 Paint (B) — see Painting.
The bar also carries  Doors and windows and
  Repeat: see Windows, doors and repeating.
Typing a size
When you draw a line or a rectangle, or pull a face up, just type the size and press Enter. You do not have to click anywhere: the numbers appear on the bar.
- One size: the length of a line, or how high you pull a face up. Type for example 6 and Enter.
- Two sizes for a rectangle, separated by a semicolon: 20;8 is twenty by eight.
- Backspace takes off the last digit, Escape the whole size.
Real size or scale size
On the bar, after Sizes, you choose how you see and type sizes:
- Real (m) — the real size in metres. A door is 2.1 high, a storey about 3.
- Scale (mm) — the size on your layout in millimetres. Handy when you want a building to fit exactly into a spot on your layout.
Your model does not change; only the numbers do. TRAX3D remembers your choice in this browser.
A roof
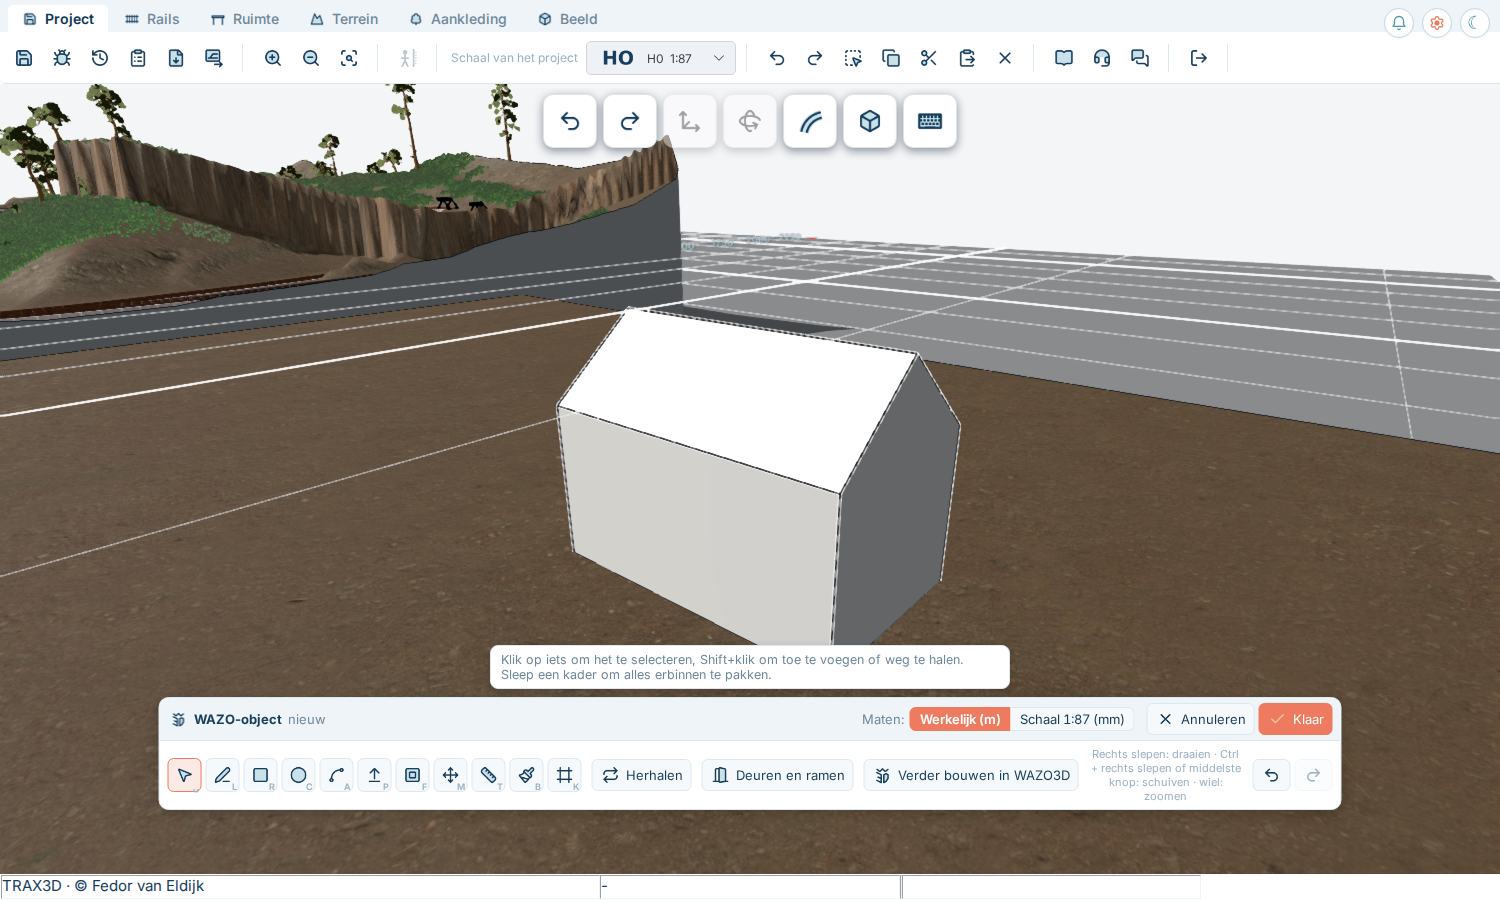
In TRAX3D you make a gable roof yourself, in two steps:
- With Line (L) draw a line across the top of your block, from the middle of one short side to the middle of the other. WAZO helps you find the middle. That line becomes the ridge.
- Pick up the ridge with Move (M), move upwards, type the height of the roof (for example 2.5) and press Enter. The two roof faces follow by themselves.
A hip, mansard or sawtooth roof in one click you find in WAZO3D: see More in WAZO3D.
Stopping and undoing
- Escape stops what you are doing and gives you back the selection arrow.
- Delete removes what you have selected.
- Ctrl+Z undoes the last step, Ctrl+Y does it again. The buttons

 on the bar do the same.
Done or cancel
 Done keeps your object and puts it on the layout: see Keeping, changing and sharing.
  Cancel closes WAZO without keeping anything.
7.2 Windows, doors and repeating
Doors and windows
Doors and windows on the WAZO bar opens a list of windows, doors, garage and shed doors and industrial doors.
- Pick one.
- Move over a wall. The window or door lies flat against the wall and cuts a hole in it.
- Click to put it down. Pick the same one again for the next, or another one.
Escape stops placing.
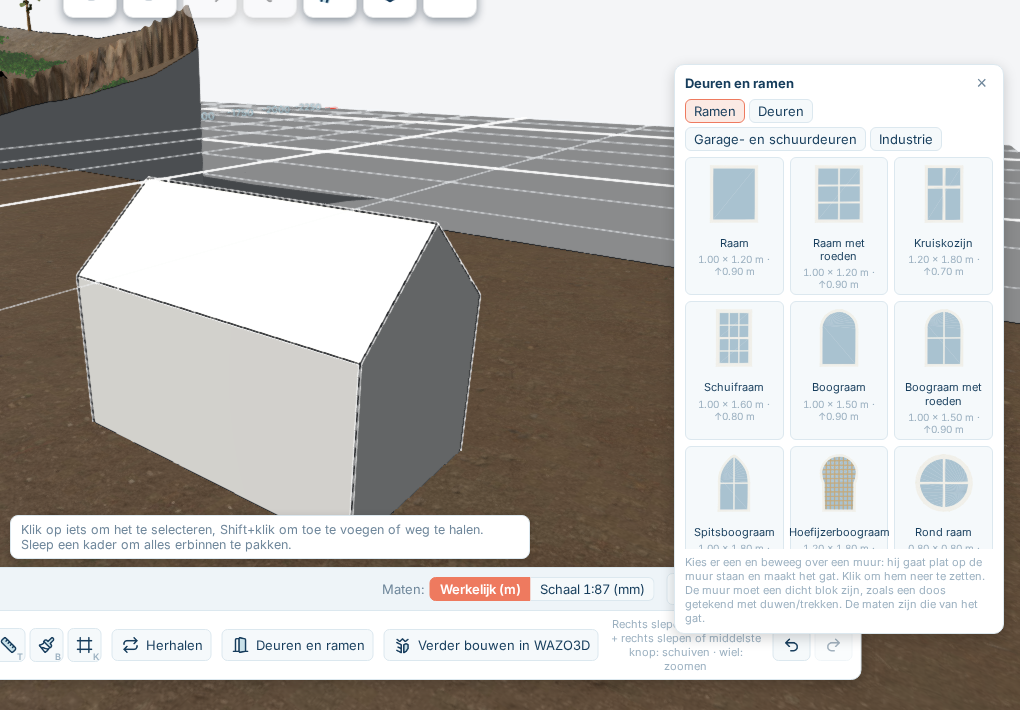
The sizes in the list are those of the hole: width, height and for a window the pane size. Click a placed window to change its sizes; Standard size puts them back.
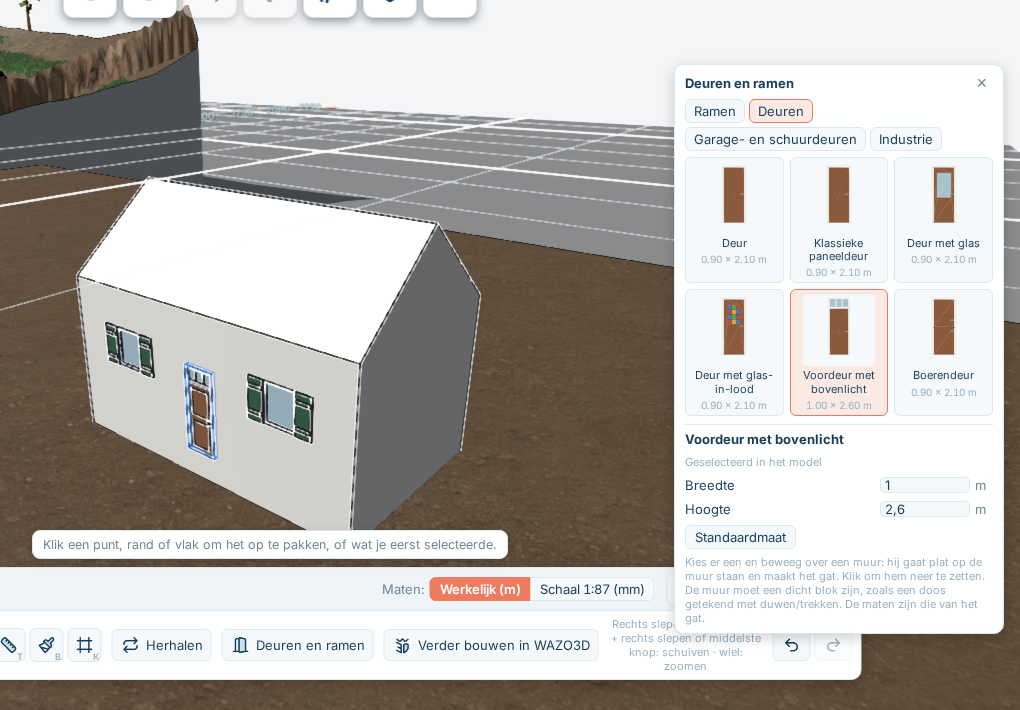
Windows you placed as copies of each other share one part: change one and they all change. You see it in the message Selected: … placements share it and change together.
Repeating
Twelve identical windows in a front, a row of chimneys, posts round a turntable: you draw it once and let it repeat.
- Select what you want to repeat.
- Click Repeat on the bar.
- Choose how:
 Row — a number of copies one after another, with the space between them and a direction. With Point it out you click the direction in your model.
 Grid — columns and rows, for example the windows of an office front.
 Circle — round a centre you click, with an angle per copy. Turn the copies with it keeps them facing the centre.
 Along a line — along a line you draw in your model.
- You see the copies in the model at once. Apply really puts them there.
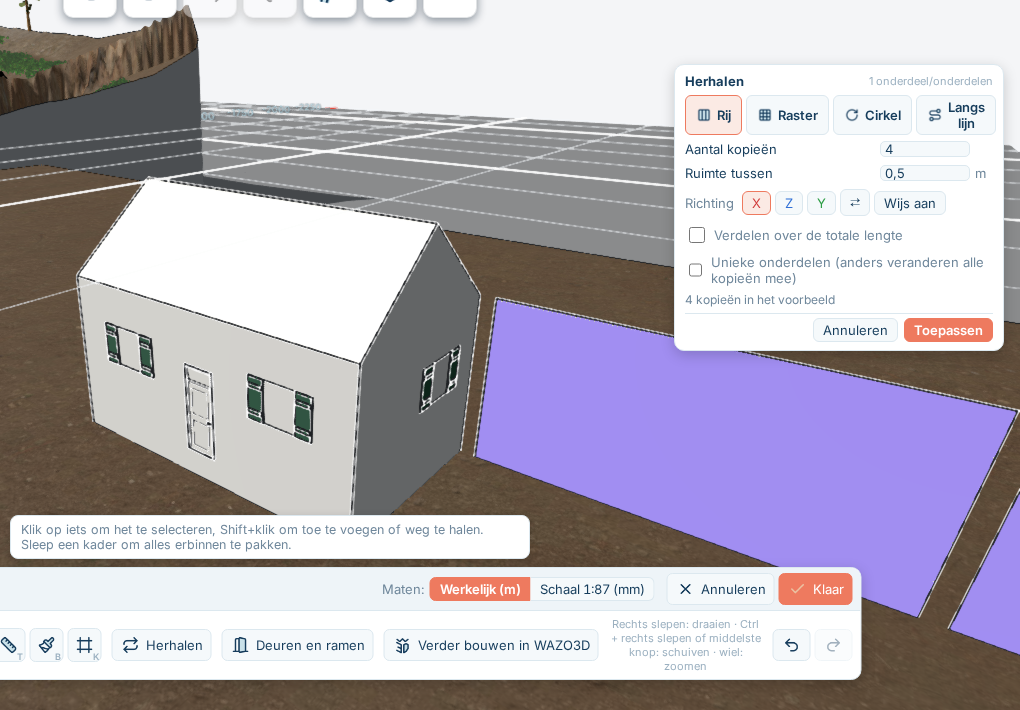
With a row, a circle and a line you can also spread the copies: you give the total length or angle and WAZO spreads them over it.
Normally copies are one part: change one and they all change. To change them separately, switch on Unique items before you apply.
7.3 Painting
Paint (B) opens a palette above the WAZO bar.
A texture or a colour
Under Textures are the standard textures, in groups: brick, stone, plaster, concrete, wood, metal, roof, paving, rock and ground. Below them you can also pick a plain Colour.
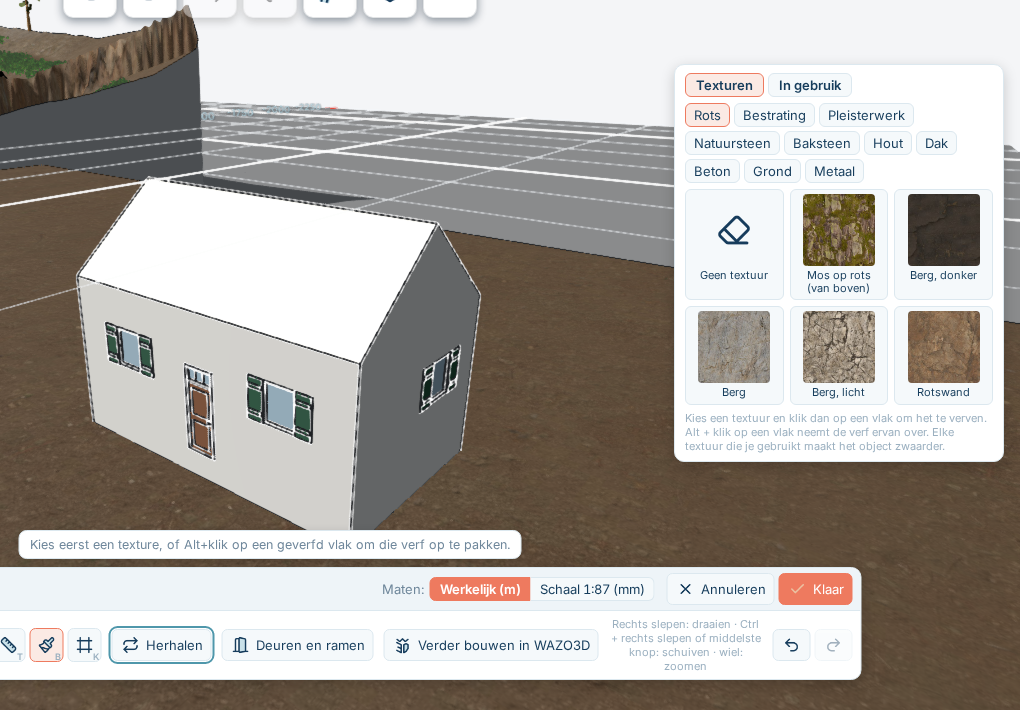
- Pick a texture or a colour.
- Click a face of your model.
Alt + click on a face takes over the paint of that face, so you can go on painting with what is already there.
 No texture takes the paint off a face.
How big a brick is
Under In use is everything you have used in this model. Pick one to paint with it again, or to change its size:
- Width and Height are the real size of one tile of the texture: how big the pattern comes out on the wall.
- Turn turns the pattern, for example for planks that stand upright instead of lying flat.
A texture with a red border has a pattern smaller than 20 centimetres. From a distance that looks like one colour. Set the width and height back to a real size: a piece of brick wall about 2.5 metres wide is a good size.
In the CAD look
In the CAD look every building is grey, without texture. Your paint is not gone: in the realistic look it is there again.
7.4 Keeping, changing and sharing
Done
Done first asks two things:
- What is it called? — the name that stands in your buildings panel.
- What kind of object is it? — the category, so you find it again. Pick one from the list or type a new one.
Then the object is kept and stands where you drew it, on the table below it. It is one step in undo. Like any other building you can then click it, move it, turn it and take it away; see Buildings and objects.
If you draw on a spot where there is no table, the object is kept but not placed. Then drag it from the buildings panel onto a table.
Where you find it again
 Your WAZO objects are in the Buildings panel, marked my own. You can put them on any layout of yours, just like the buildings from the catalogue.
Changing it later
Click your WAZO object on the layout. On the object tab is the WAZO group with  Change it, here in the layout: WAZO opens again with your model in it. A double click on the object does the same.
When you press Done again, the object keeps its name. Every layout it stands on gets the new version, also when you use it on several layouts.
The previous version is kept.  Go back to the previous version puts it back, and you can undo that step too.
Sharing, deleting and versions
The buttons below are on the picture of your object in the Buildings panel: move over it or pick it. Sharing, a newer version and going back to the previous version are also in the WAZO group on the object tab.
Sharing with others
 Share this WAZO object makes it available to other model railroaders: they can put it on their own layout, with your name beside it. It also appears in WAZO3D's showcase.
Deleting
 Delete this WAZO object takes it off your layouts and out of your buildings panel. As long as it is not shared and used by somebody else, you can always do that.
Going on in WAZO3D
You can also finish a WAZO object in WAZO3D, the full program, and use models from WAZO3D here. How that works is in More in WAZO3D.
How big an object may be
A WAZO object may be up to 10 MB and up to 150,000 triangles. An ordinary building does not come near that. If an object is refused, TRAX3D says why. Usually it is too many different textures or too many small details.
7.5 More in WAZO3D
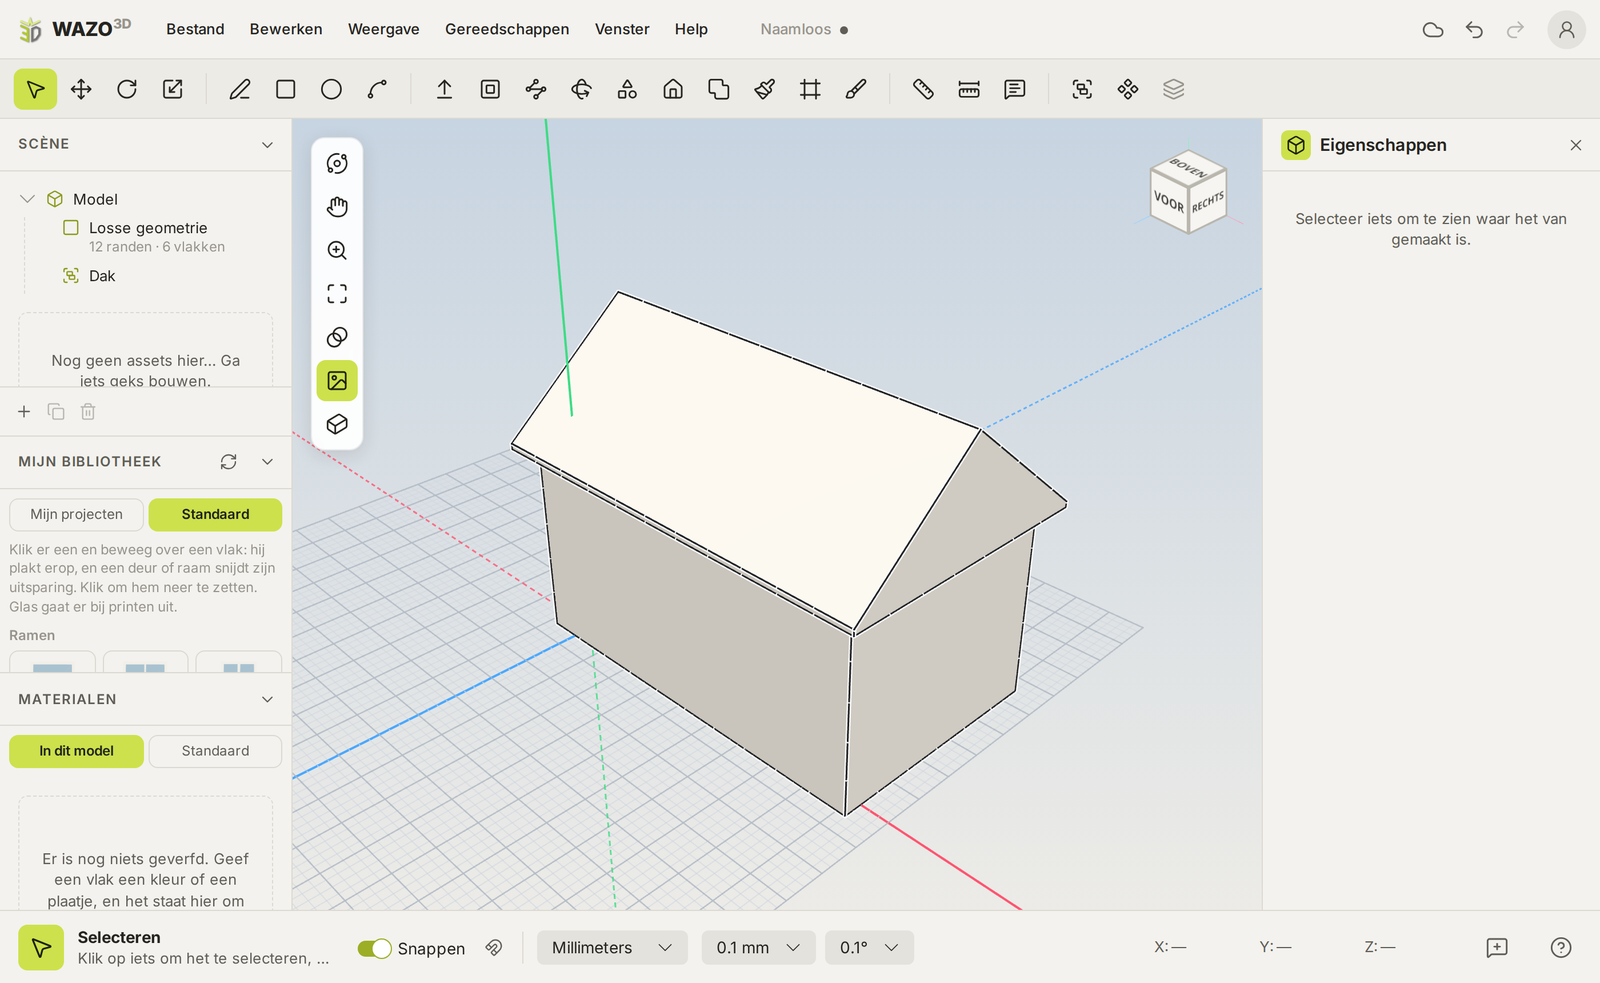
The WAZO in TRAX3D is made to put a building on your layout quickly. If you want to go further, there is WAZO3D: the full drawing program, with a website of its own (wazo3d.com). Your WAZO objects go back and forth between the two.
What WAZO3D adds
- Roofs in one click — in the Building kit (menu Tools): gable roof, hip roof, half-hipped roof, shed roof, pyramid roof, flat roof with an edge, mansard roof, gambrel roof, sawtooth roof, monitor roof, barrel roof and more. Select the top of your walls and pick one.
- Round shapes — a sphere, a dome, a cone or a ring, for a water tower, a silo or a church tower.
- Solid tools — join two shapes, take one out of the other, or keep only where they meet. That is how you make a passage, a bay window or an extension.
- Tracing a photograph — put a photograph of a real building in your model as a reference photograph, straighten it and draw over it. That is how you build the station of your own village.
- Your own library — parts you made before, such as a window frame or a chimney, you put into every new model.
- Repair — Make watertight closes open edges, so a printer and a cutting plan get a closed shape.
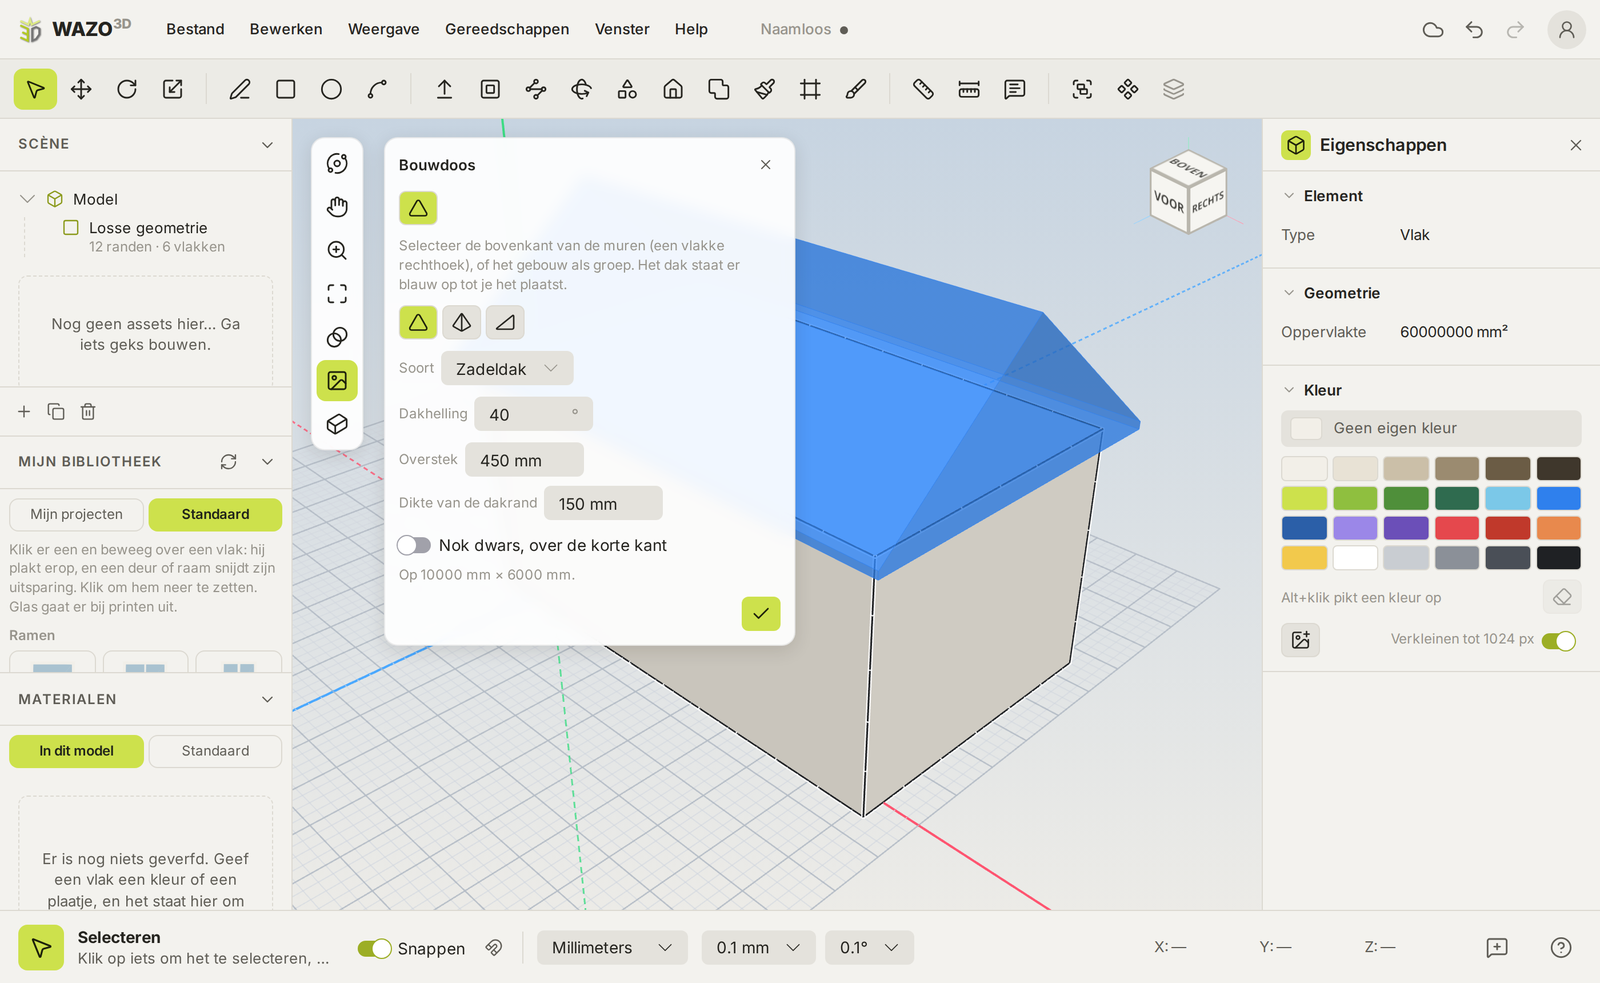
Building your building for real
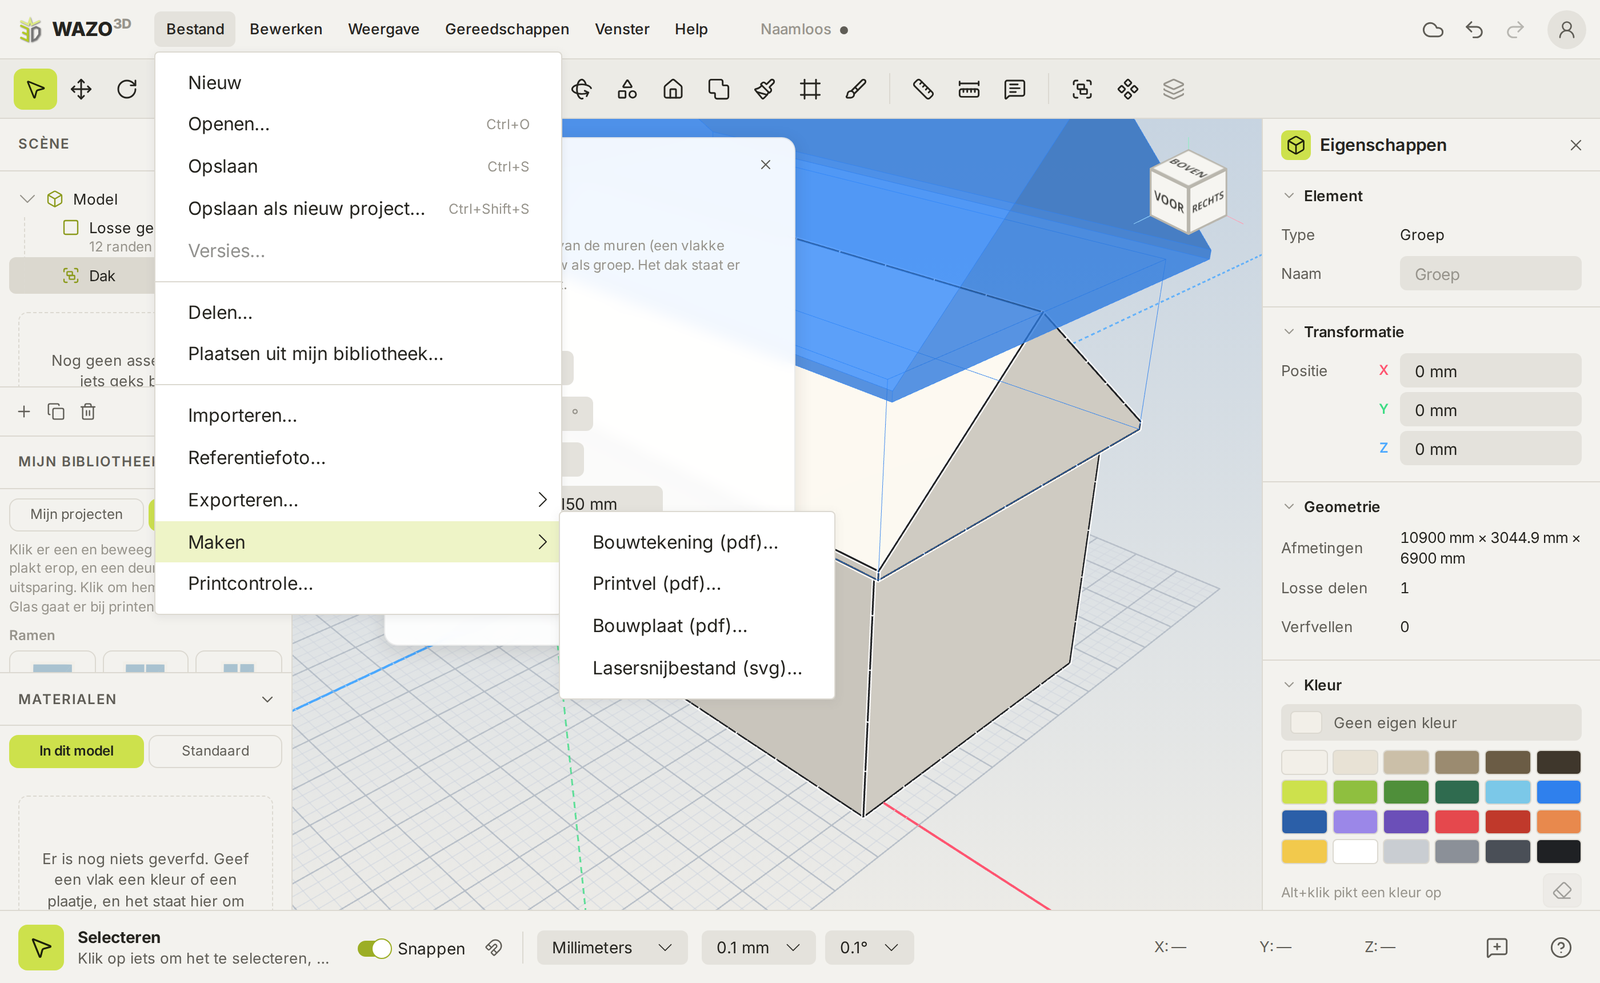
What you see in TRAX3D is your building at the scale of your layout. To build it for real, WAZO3D makes files of it. You find them in the File menu, under Make and Export:
- Construction drawing (PDF) — three views to scale with the main sizes. To build from in wood or plastic sheet.
- Print sheet (PDF) — every coloured face laid flat to scale, with the windows and doors left open. Print it and glue it on card.
- Cut-and-fold sheet (PDF) — the model unfolded, with fold lines, cut lines and glue tabs: cut, fold, glue.
- Laser cut file (SVG) — the walls as cut lines for a laser cutter.
- STL — for a 3D printer. Open it in your printer's program. Print check tells you beforehand whether the model is fit to print.
- Also OBJ, FBX and glTF, for anybody who wants to go on in Blender or another 3D program.
All print and cutting files come at the scale of your layout.
If you have a build plan of your layout, your WAZO objects are in it too: with their sizes, how often they stand on the layout, and these steps.
From TRAX3D to WAZO3D
- Go on building in WAZO3D — open your WAZO object in TRAX3D (double-click, or on the object tab) and pick Go on building in WAZO3D on the WAZO bar. The model opens in the full program.
- Kept at WAZO3D too — TRAX3D also keeps a copy of every WAZO object at WAZO3D. That way the model can go on there, and the two keep the same version.
- Shared — when you share a WAZO object in TRAX3D, it also appears in WAZO3D's showcase, as available in TRAX3D.
From WAZO3D to TRAX3D
Models you draw in WAZO3D you can put on your layout too. In the Buildings panel:
 Pick one of your own shared WAZO objects in WAZO3D — a window opens in which you point out the model.
 Fetch a WAZO object by its share link — paste the link WAZO3D gave you when you shared it.
If you improve the model in WAZO3D afterwards, TRAX3D sees it. The object shows  Ask WAZO3D for a newer version; when a newer version is ready, the button lights up and one click takes it over. Every layout it stands on then gets the new version, and the previous one is kept.