
On the right track
Track is what a model railway planner is about, so that is where we go. This chapter is about everything TRAX offers for laying it.
We start with a quick start. If you want to get going straight away, that puts you on your way in a few steps.
Then come the basics: starting, adding, selecting, moving, joining and deleting. It pays to get those under your fingers; with that handful of moves you build most of any layout.
In the context tabs you see where the buttons that belong to your selection are — which tab you get depends on what you clicked.
Flex track is the kind you shape yourself. TRAX gives you complete freedom there and has three ways of doing it.
After that it is about heights and grades: how you make your layout climb and fall, and how you take a whole yard along in one go.
And finally advanced track planning: parallel track, colours from the legend, tunnels and bridges, and the lock.
3.1 Quick start
To get you going: follow these steps and you have your first stretch of layout within a few minutes.
1. Choose a library
Open the Tracks panel with  on the Track tab. At the top is the library you are using, with
  beside it. Click that and choose the make and the scale you want to build in.
The list fills with that make's track pieces.
2. Make a table
Go to the Room tab and click  Draw a table. You get a table of 1200 by 600 millimetres. That is a shelf you can reach across: deeper than an arm's length does not work in real life.
A table in TRAX is the board your layout stands on. Track, landscape and buildings belong to it and come along when you move it.
You can also lay track first and let TRAX make a table around it afterwards — see Making tables.
3. Lay your first piece of track
Drag a piece from the list onto the table and let go. The piece lands on the ground, exactly where you released it.
At both ends you now see a dot. One of them is red: that is the selected end, and the next piece goes there.
4. Add a piece
Double-click the red dot. A new piece is joined on — the one selected in the list at that moment.
Double-clicking a row in the list does the same, and then you decide which piece it is as you go.
Repeat that a few times and you have a run: a series of track pieces joined together.
5. Make a second run and join them up
Drag another piece to a different spot on the table and build a second run there.
Now take a dot of the second run and drag it onto a dot of the first. Let go: the two runs are joined, and the second has been turned neatly into line.
6. Save
Go to the Project tab and click  Save to the cloud. TRAX takes a photograph of your layout as it does so; you see it again on My projects.
That is the heart of it. The basics has the rest.
3.2 The basics
With these moves you build most of any layout.
Starting a new run
- Drag a piece from the list into the workspace. Over a table the piece rides along the terrain, so you see at once where it will land.
- Or double-click an empty spot in the workspace, away from the tables. The piece selected in the list is put down there.
On a table double-clicking does not start a run: there a double click opens the table's shape. So on a table, dragging is the way.
Adding a piece of track
There are three ways:
- Double-click a dot. A new piece is put at that end — the one selected in the list.
- Double-click a row in the list. That piece is put at the selected end, the one with the red dot.
- Drag a piece from the list and drop it on a dot.
Selecting
- One piece: click it.
- Several pieces: hold Ctrl while you click.
- A whole run: double-click a piece. Everything joined to it, directly or through its neighbours, is selected.
- An end: click the dot. It turns red; that is where the next piece goes.
- An area: click
 on the Project tab and draw a box around the pieces you want.
 - Walking along the track: with a piece, a dot or a join selected, the arrow keys step to the piece joined in that direction. Hold Shift or Ctrl and the next piece is added to the selection instead of replacing it. At a turnout the arrow takes the leg that best matches that direction on your screen.
Whatever you select, a tab appears on the right of the ribbon with the buttons that belong to it. See The context tabs.
Moving
Drag a dot at the end of the run. Everything joined to it comes along.
If there is a pin anywhere in the run ( on the Item tab), the dot stays where it was. Take the pin out to free it again.
Joining two runs
Drag a dot of one run onto a dot of the other and let go. The runs are joined and the one you dragged is turned into line.
Turning
A turnout or a crossing can be turned round so that it joins on differently. Select the piece, click the dot you want to join with, then click  Turn the connection on the Item tab.
To turn a selection through an angle, use the field in the Turn group on the Item tab, or switch the turn gizmo on with  on the View tab.
Which way a curve bends
 The Track tab has the Direction button. It decides which way a new curve bends. Click it to flip before you insert the curve.
Deleting
Select what has to go and press Delete, or click  on the Project tab.
Undoing
 and
and  on the Project tab, or Ctrl + Z and Ctrl + Y. Every action is one step: a whole brush stroke over the terrain, a whole drag, filling in a whole landscape.
Copy and paste
 copy,
copy,  cut,
cut,  paste. At the moment only track travels through the clipboard; trees, buildings and roads do not yet.
Escape
Esc is the universal stop button. It puts down the tool that is on, stops a line you are drawing, leaves a shape editor and drops the selection. Not sure what you are in the middle of? Escape.
3.3 The context tabs
The moment you select something, a tab joins the ribbon on the right. What is on it depends on what you clicked, and the tab's name tells you what that is: Straight, Curve, Turnout, Table, Water, Platform, Object.
There are seven of them, and they are all built the same way: information about what you selected on the left, the buttons you can let loose on it beside that, and a waste bin on the right if the thing can be deleted.
The Item tab: track
The tab for a piece of track or a selection of pieces.
- Info shows what you have: the article number, the length, the radius and the angle. For a selection, the number of pieces and the total length.
- Turn the connection turns a turnout or a crossing so that it joins on differently. Click the dot you want to join with first.
 Height is the field that sets the selection's height, with the button beside it that takes over the height of the ground underneath. See Heights and grades.
 Lock comes in two: the pin fixes the selected pieces, so that they and the track joined to them no longer move and they keep their height; the second fixes the height relative to the neighbours, so that a piece goes up and down together with them.
 Kind of track: on the ground or in a tunnel.
 Or on a bridge. TRAX takes that into account when it generates the terrain.
- Turn is the field for the angle.
- Legend gives the selection a colour. See Advanced track planning.
- Parallel lays a second track beside the one you selected.
The Table tab
 Move: the move gizmo and the turn gizmo.
 Shape: moving the table, or editing its shape.
 Collect the track hands every piece above this table to the table.
 Lock the terrain, so that generating the terrain leaves this table alone.
See Make room.
The Line tab: roads, fences, hedges and walls
Width, height, the spacing of a fence's posts, a road's middle line,  a retaining wall, a hedge's density and how well it is clipped, the texture, and editing the shape. See Roads, fences, hedges and walls.
The Water tab
Kind of water, level, depth, width, current, swell,  walls along the banks and the bank protection. See Water.
The Platform tab
The texture of the deck, the edge, the height above the rails,  a side as a ramp, and the shape. See Platforms.
The Object tab
For a tree, a building or a stone:
- Moving and turning.
 Scaling.
- Or the exact scale, height, heading and tilt as a number.
The CAD tab
That one does not belong to a selection but to the look: choose CAD and it joins them. See The drawing.
3.4 Flex track
Nearly every make has flex track: a piece you bend yourself. In TRAX you use it in three ways.
1. A curve to measure
 The Track tab has Insert a curve. Fill in the radius and the angle first, then click the button. You can click it several times in a row to make more curves.
beside it decides which way it bends.
This is how you get a curve no make supplies — a curve of 743 millimetres through 27 degrees, because that is simply what fits.
2. A straight to measure
 Straight does the same for a straight: fill in the length and click.
3. Shaping it freely
Put a flex piece down the way you put down any other: drag it from the list or double-click a dot. After that you shape it with the mouse.
Drag the dots at the ends. The track runs smoothly between the two.
To steer the bend yourself, double-click the piece. Two extra handles appear, with a red line from each end to its handle. That line shows the direction in which the track leaves the end. Drag the handles to change the bend.
If an end is joined to another piece, the direction there is fixed — the track has to meet its neighbour properly, after all. If the end is free, you can turn the direction as well.
Which flex piece
The Track tab has the Flex track list, with the flex pieces from the library you are using. That piece is what a straight or a curve to measure is made from. If the library has no flex track, those buttons are off.
And a fourth kind
When TRAX works out parallel track for you, it uses flex track wherever no stock piece fits exactly. Flex track inserted that way has a fixed shape you cannot adjust yourself.
3.5 Heights and grades
A layout that is only ever flat is a layout without a story. In TRAX you give track height in three ways.
Remember as you go: height 0 is the top of the rails, not the top of your table. Every height is measured from that line.
1. Filling in a number
Select a piece or a run. The Item tab has the Height field. Type a value into it or use the arrows beside it.
TRAX does not lift that one piece alone: the track joined to it climbs along, at the steepest grade you have allowed. That gives you a rising stretch by itself instead of a break in the track.
Those maximum grades are in the Settings panel, separately for straight track, for curves and for the rest. In real life two per cent is a lot; three per cent is hard climbing.
When the whole layout moves with it
A piece of track may only rise its own length times the grade. A 110 mm straight at three per cent may go up 3.3 mm, so a difference of 50 mm needs well over a metre and a half of track to run out in — and that in every direction from the piece you lift. On a layout with loops, where the track keeps coming back on itself, that is soon the whole of it.
When TRAX sees that more than half of the joined track went with it, it says so, with the figures. You get that message once a session: it is a thing to understand, not a thing to be told every time.
What you can do about it: lift in smaller steps, put the height-difference lock (below) on the pieces that must stay where they are, or allow a steeper grade under Settings.
2. Taking the height of the ground
With this button on the Item tab the selected track takes over the height of the terrain under it. If you have several pieces selected, TRAX does it for each piece separately, so the track follows the landscape.
3. With the gizmo
 Switch the move gizmo on with the View tab. Click a dot: arrows appear along the axes. The vertical arrow is the height. Drag it up or down.
The ground comes along by itself
This is the great difference from the old days: you do not have to adjust the ground separately, as long as Ground follows track and objects is on in the Settings panel. Lift a stretch of track and the ground under it comes along — as an embankment. Lower it and the ground digs itself in — as a cutting. Move the track away and the old ground comes back the way it was.
The same holds for roads, walls, platforms and buildings. See The landscape.
Locking the height difference
On the Item tab, beside the lock, is the Height difference button. Turn it on and a piece can no longer change height relative to the pieces joined to it. Move it up or down and all its connected neighbours move by the same amount. It is as if the maximum grade there were zero.
That is exactly what you want for a yard or a station: it lies level and has to go up or down as a whole, not piece by piece. The loose track beyond it then follows by the ordinary grade rule again.
Tunnels and bridges
If your track runs through a mountain or over a valley, say so with and on the Item tab. TRAX takes it into account when it generates the terrain: over a tunnel it puts enough mountain to make it a tunnel, and under a bridge it digs a valley instead of throwing up an embankment. Under track on a bridge TRAX also builds a real bridge, and in the CAD look the track gets a wide band along the rails. How you choose and adjust that bridge is under Bridges.
Tunnel portals
Where a piece in a tunnel meets ordinary track, TRAX puts a tunnel portal there by itself. You place nothing: take the tunnel mark away and the portal goes too.
- Tracks that go into the tunnel side by side get one wide portal together.
- Behind the portal the tunnel wall runs on a little way, so you look into the tunnel; further in it is dark.
- On a table with a landscape the ground meets the portal exactly: the hill behind it, the ground in front.
Click a portal and you get the portal tab:
- the type: stone arch, modern concrete, brick arch, stone with wing walls, or bare rock;
- the opening: an arch, rectangular, oval or round;
- the tunnel wall: as the portal, concrete, stone, brick or rock;
- on its own: this track gets a portal of its own instead of one shared with the tracks beside it;
 design: adjust this portal in WAZO (see below);
 back to standard: remove your own design; it stays in your list;
- all portals: give every portal of your layout this type, and your own design if it has one.
Every change is one step that undo takes back.
Adjusting a portal in WAZO
If you want a portal that looks a little different, adjust it in WAZO, the builder inside TRAX.
1. Click the portal and choose Design.
2. WAZO opens right where the portal stands, with the portal as it is now: the headwall, the opening at the right size, the ring round it and the same textures. An orange line shows how much room the trains need.
3. Shape the portal further with the ordinary WAZO tools: make it taller, wider or deeper, put something on it, give it another texture. With  in the WAZO bar you switch the textures off and on again, to see the shape better.
4. Choose Done. Your design is now this portal, as a variant of its type. That is one step that undo takes back.
A portal you have designed opens with your own design the next time. If you choose another type, the portal gets that type's ordinary look again.
3.6 Bridges
You do not place a bridge: you mark track as a bridge and TRAX builds the bridge under it. Move the track and the bridge moves with it. Take the mark away and the bridge is gone.
Making a bridge
1. Select the pieces of track that should run over the bridge.
2. On the Item tab, choose On a bridge.
That is all. TRAX asks nothing: you get a plain steel girder bridge on tapered concrete piers, with an abutment at each end. You can change all of it afterwards.
- A continuous stretch of bridge track is one bridge. Where it meets ordinary track, an abutment stands.
- Tracks that run side by side over the bridge share one bridge with a wide deck.
- In a curve the bridge is made of straight spans, each turned a little, as on the real railway. The track curves across them; the spans meet at a mitred joint.
- The bridge's model is built by WAZO, the builder inside TRAX. That takes a fraction of a second. Everybody who views your layout sees the bridge too.
The Bridge tab
Click the bridge (not the track on it) and you get the Bridge tab:
- how many tracks, how many spans and how long the bridge is in the prototype;
- the type: steel girder bridge, plate girder (the track runs between two tall plates), truss bridge, low truss, a concrete beam viaduct, a timber trestle or a masonry arch viaduct;
- the piers: tapered, straight, with a cap, a round column, with rounded ends or two columns side by side, and their material: concrete, stone or brick. A trestle stands on timber bents and an arch viaduct on piers of its own, so there you choose no pier shape;
- the detail: fine or simple (see below);
- the textures: five buttons for the deck, the steelwork, the piers, the abutments and the trim (arch rings, copings and railings). Each button shows the texture that part wears now. Click it and you see every texture, in groups, with a search box;
- the span: automatic, one span, or a fixed length of 10 to 60 metres;
 piers by hand: see below;
- To WAZO: see further on;
- apart or together: give every track of this bridge a bridge of its own, or join tracks side by side into one bridge again;
- all bridges: give every bridge of your layout this type, these piers and this material.
Every change is one step that undo takes back.
Detail
On fine, a steel bridge gets what you want to see on a 3D print: girders you recognise as an I-beam, with a web and two flanges, stiffeners on them and rows of rivets along the flanges. A truss gets gusset plates and bracing, an arch viaduct an arch ring standing proud of the face, a string course and a coping on the parapet.
On simple, only the large shapes remain. That reads more calmly on a big layout, and the model is lighter. When a bridge is so long that the details would be too many, TRAX builds it simple by itself.
Where the piers go
On automatic, TRAX spaces the piers to suit the type: close together under a girder bridge, far apart under a truss. In a curve the spans get shorter so the track stays on the deck, but never shorter than eight metres. A pier reaches down to the ground under it. Where the ground comes up to just under the bridge, there is no pier.
TRAX never puts an automatic pier on track that runs under the bridge, nor on a road. Such a pier moves along a little, to the first place that is free.
Piers by hand
To decide yourself where the piers stand, switch on . Every pier gets an orange dot under the deck, and an orange line shows where the bridge runs.
- Move: drag a dot along the track.
- Add: click the bridge where there is no pier yet.
- Remove: click a dot so it turns red, and press Delete.
Escape switches the tool off again. From the first change the piers are yours: each pier hangs on a piece of track, at a fixed place on it, and stays there whatever else you change in the layout. Choose automatic for the span again and TRAX takes over once more.
Abutments and the terrain
At each end stands an abutment: a bearing shelf the bridge rests on, a ballast wall behind the end of the bridge, and wing walls along the track.
On a table with a landscape, TRAX shapes the ground around it:
- behind the abutment an embankment up to under the ballast bed, falling away to the sides and further on;
- in front of the abutment the ground stays under the bridge, with a slope running down from the bearing shelf;
- under the rest of the bridge the automatic landscape digs a valley.
Track that is already there and water are never covered.
Checking
In the CAD look, the checks include two that are about bridges only:
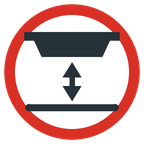 Clearance under a bridge: does the tallest wagon on the track below fit under the girders or the deck?
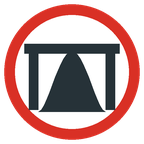 Bridge in the ground: does the underside of a span run into the ground?
Making a bridge for real
To build the bridge for real, you get it ready for the printer or the cutter in WAZO3D.
1. Click the bridge and choose To WAZO. WAZO opens the bridge exactly as it lies on your layout.
2. Choose Done. The bridge is kept with your WAZO objects. The bridge on your layout stays as it is and keeps following the track.
3. Open it in WAZO3D. For a 3D printer, have the model made watertight and export it as STL; print a long bridge in parts. For card, wood or plastic sheet, have a cut-and-fold sheet or a print sheet made, as a PDF at your layout's scale.
If you order a build plan, it says per bridge what to build, with the height of every pier.
3.7 Advanced track planning
Parallel track
TRAX can lay a second track beside an existing run.
- Select the run: Shift-click a second piece, or double-click a piece. Straights, curves, flex track and turnouts count; through a turnout the run goes by its toe and one branch. The Parallel group appears on the Item tab.
- Click
 . Only then do the spacing and the buttons beside it become usable.
 - Two This side labels stand beside the track. Click the one on the side where the new track is to go; it is shown in red and the label you chose turns green. The other label stays, so you can still switch.
- Set the spacing. Under the field are buttons with your library's standard spacings, 77.4 and 64.5 for Märklin M for example: a click takes that spacing.
- Click to insert it for real, or
 to leave it.
TRAX takes a stock piece when one fits exactly, flex track otherwise. When the library has neither, as with Märklin C and M, a gap is left there and TRAX says so. Choose one of the standard spacings then: they suit your library's curves.
When a turnout in the run branches off toward the side where the parallel track goes, the parallel track stops at that turnout: it would have to cross that branch. To go on, select the part on the other side of the turnout separately.
The spacing and the norm
TRAX reads the standard spacings off the library itself. Makers lay their standard curves exactly one track spacing apart, and two of the same turnout joined by their diverging legs give a fixed spacing too.
The spacing has a lower limit: the smallest distance between two tracks on the real railway, scaled down. That is 4 metres for standard gauge, 46 millimetres in H0 (NEM 112), and 3.5 metres for metre gauge. TRAX offers no standard spacing under that limit. Type a smaller spacing yourself and the figure turns red, and TRAX explains what can go wrong: passing trains that touch, no room for signals or masts between the tracks. You can still lay the track. Curves always need more room than this minimum for straight track.
The legend
In TRAX you can give track a colour to show what it is for: a yard, a freight route, the part you have already built.
- Select the track and choose a colour from the Legend list on the Item tab.
- adds a colour. Click the coloured square, pick your colour, give it a name and confirm.
 edits the colour that is selected.
The legend belongs to your layout and is saved with it.
The pin
On the Item tab the pin fixes the selected track. A red pin appears in every selected piece. Such a piece can no longer move, and neither can the track joined to it: the dots stay put, the gizmo does not take it, and it will not turn. Click again with the same pieces selected and the pins come out.
A pinned piece also holds its height. Change the height of a stretch elsewhere and the change stops at the pin: the track before it runs out to it at its grade, and the pinned piece and everything beyond it stay where they are. To make a piece go up and down together with its neighbours instead, fix the height difference.
What TRAX watches for you
TRAX knows the NEM (MOROP) and NMRA standards and uses them itself:
- Over a tunnel it lays at least twice the loading gauge in mountain, plus a tunnel wall. Under a bridge it keeps at least one gauge clear.
- Plants and objects you spray keep out of the loading gauge. A tree does not grow between the rails.
- Platforms are set at the distance from the rails the standard prescribes: 1650 millimetres from the track's centre.
A screen that warns you about curves that are too tight and grades that are too steep is coming; the arithmetic is already in there.
The NMRA standards are on nmra.org in English. The NEM standards are on morop.eu in German, French and Dutch.