
Introduction
This manual helps you find your way around TRAX3D and get everything out of it that is in there. You do not have to read it from front to back: every chapter stands on its own and every page is about one thing.
Buttons and text too small? The View tab has the button Large buttons and text (150%), beside full screen. One click, and the ribbon and all the panels become one and a half times as large. TRAX remembers it for all your layouts. More in The panels. Quicker: press Alt + Shift + T; the same keys switch it off again.
After this introduction we start with how you make a layout in Starting a project. After that, seven chapters explain how you design it.
- The editor shows you around: where the buttons are and where to find what.
- On the right track is about laying track. It starts with a quick start in which you put down your first pieces and join them up. Then come all the basics, flex track, and heights and grades.
- Make room is about tables: the ground your layout stands on.
- The landscape is about the ground itself. You sculpt hills and valleys into it and paint grass, sand and rock onto it. TRAX can also generate it for you.
- Scenery is everything that stands on the ground: grass and flowers, trees, buildings, roads, fences, hedges, walls, water and platforms.
- The drawing is about CAD mode: the technical view in which you measure, put dimensions on your layout and check that it works.
- Sharing is about showing your layout to the rest of the world.
What you need
TRAX3D runs in your browser. There is nothing to install, but you do need a browser from the last few years and a computer that can handle 3D. A mouse with a scroll wheel makes the work a good deal more pleasant than a touchpad.
If you get stuck
Have you read the manual and want to know more? Come to the forum, where you get help from fellow TRAX users and can share what you have worked out yourself.
If something is really wrong, use the support form. From inside the editor you can send a report straight away with the  button on the Project tab. That one sends the event log with it, and the log tells us far more than a description written afterwards.
1.1 Starting a project
Before you can get into the editor you need a layout. Every layout is a project with a name, a description and settings about who may see it.
Making a new layout
- Sign in and go to My projects.
- Click New layout.
- The editor opens straight away with an empty layout.
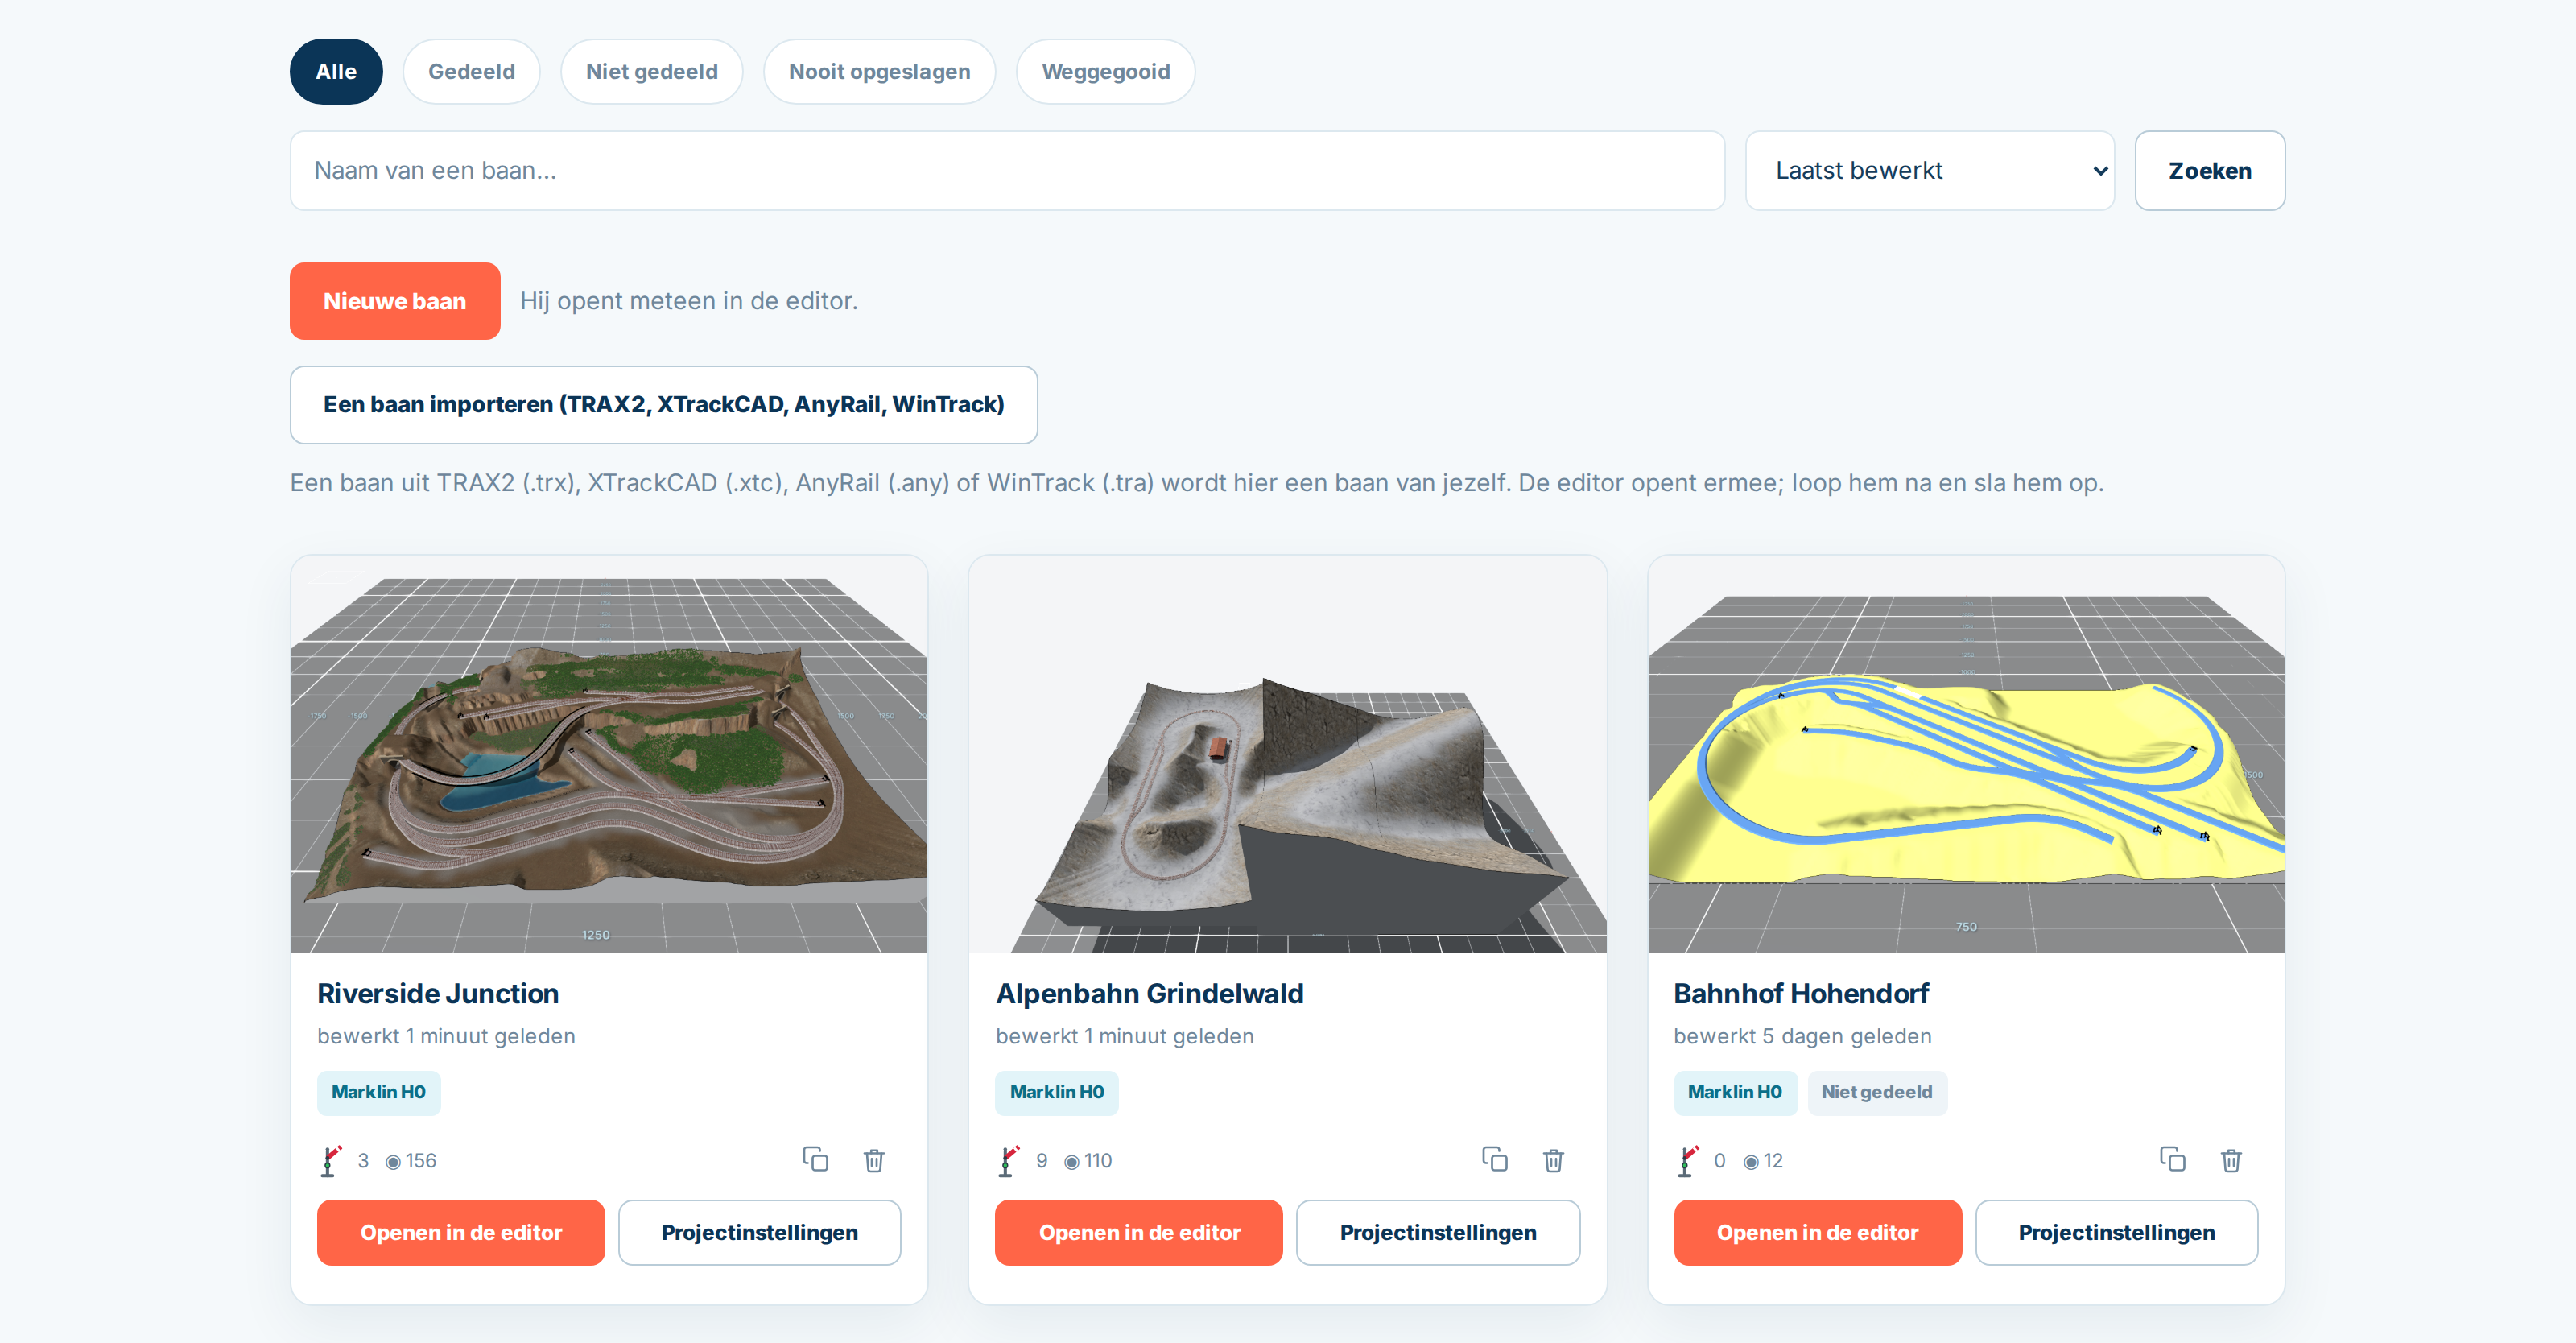
Your new layout has no name yet and nothing in it. That is fine: the name and the description come later, and your layout only really exists once you save it for the first time in the editor.
Your layout's information
Back on My projects, every layout carries Project settings. That is where you say what your layout is:
- the name, which stands above your layout everywhere;
- the story: where the layout is set, in which era, what you have in mind. You can paste pictures into it and put in links to video;
- tags, separated by commas;
- Visible to everybody: on means your layout stands in the showcase and anybody can look at it, off means only you see it;
- Allow comments, so other people can respond under your layout.
The scale and the track libraries are not here. You pick those in the editor itself, because that is where you need them — see The panels.
Opening your layout
On every card in My projects both the picture and the Open in the editor button take you straight into the editor. The picture on the card is a photograph the editor takes itself every time you save, so it is always current.
Searching and sorting
Once you have ten or so, the bar at the top helps. You can search by name, filter on Shared, Not shared or Never saved — that last one is the list of layouts you started and never kept — and sort by last edited, created, most liked or name.